Getting started
SoftPhoneApp can be deployed with or without a configuration server. If you are deploying
SoftPhoneApp with the help of a system administrator, follow the instructions given by the
administrator.
To launch SoftPhoneApp
- Obtain the SoftPhoneApp download file and follow the prompts in the install wizard.
Your system administrator may have installed SoftPhoneApp for you using a silent
install.
- Start SoftPhoneApp as you would any other program. The SoftPhoneApp Sign In
dialog appears.
- Click Sign In
SoftPhoneApp launches. If you chose manual configuration, you are now ready toadd accounts.
Switching to configuration server details
If you accidentally selected manual configuration but you should have selected configuration
server details, you can re-enable the sign in screen.
To switch to configuration server details - Windows
- Open Softphone > Preferences > Application and select Enable Sign In screen.
- Click OK.
- Click Sign out in the Softphone menu or exit SoftPhoneApp.
- The next time you sign on to SoftPhoneApp select Enter Configuration Server details
and enter your log in credentials.
SoftPhoneApp launches with your accounts configured.
To switch to configuration server details - Mac
- Open SoftPhoneApp > Preferences > Application and select Enable Sign In screen.
- Close Preferences
- Click SoftPhoneApp > Sign Out or exit SoftPhoneApp.
- The next time you sign on to SoftPhoneApp select Enter Configuration Server details
and enter your log in credentials.
SoftPhoneApp launches with your accounts configured.
Giving Permissions to SoftPhoneApp (Mac)
On Mac, SoftPhoneApp asks permissions for:
- Notifications for incoming calls and messages. See Configuring OS notifications.
- Contacts for displaying your contact list within SoftPhoneApp
- Microphone for phone conversations
- Camera for video calls
Allow SoftPhoneApp a permission if a pop-up appears. Or change permissions by following
the steps below.
To give permissions to SoftPhoneApp
- Click the Apple icon on the SoftPhoneApp menu and click System Preferences >
Security and Privacy
- Click Privacy.
- Click Contacts in the list, and select SoftPhoneApp to allow access.
- Repeat Step 3 for Microphone and Camera if applicable.
Exiting SoftPhoneApp
When you are ready to stop using SoftPhoneApp, you need to exit SoftPhoneApp. If you simply
close the SoftPhoneApp on screen phone, SoftPhoneApp continues to run in the background.
To Exit SoftPhoneApp - Windows
- Click Exit on the Softphone menu or type CTRL+Q
To exit SoftPhoneApp - Mac
- Click Quit SoftPhoneApp on the SoftPhoneApp menu or type COMMAND+Q.
Setting up Windows Outlook accounts
Your Windows Outlook account can be used to integrate your Outlook contacts in
SoftPhoneApp. This section describes how to integrate Outlook contacts so they remain in sync.
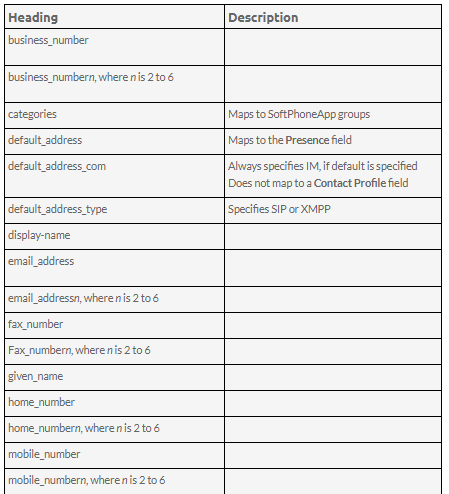
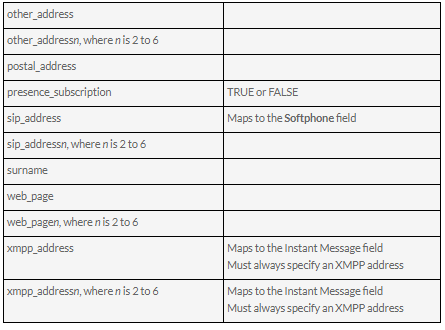
You need to map Outlook contact information to fields in SoftPhoneApp in order to make calls
and send messages to Outlook contacts.
To add your Outlook account
- On the Softphone menu, click Account Settings. The Account Settings window opens.
- Click Add and click Outlook Account. The Outlook Account window opens on the
Account tab.
- Select the Outlook profile you want to use from Outlook profile if you have more than
one profile.
- Select the Outlook contact field that you use for softphone addresses from Field to use for
Softphone address.
- Select the Outlook contact field that you use for IM addresses from Field to use for IM
address.
- Click OK.
SoftPhoneApp creates the Outlook account.
Setting up Mac Address Book accounts
SoftPhoneApp automatically pulls the Mac Address Book account contacts into SoftPhoneApp's
contacts. You can phone or IM them directly from SoftPhoneApp.
SoftPhoneApp creates the Mac Address Book account is automatically. To use the Mac Address
Book account, make sure Enabled is selected in the Account Settings window
Using you Mac Address Book for presence
If your Mac Address Book contains phone numbers that you know can be used to obtain online
activity information about the person through your SIP account, you can perform this additional
step.
To set up for presence
- In the Mac Address book make sure that the contact type is Phone and the label is
softphone (in lower case).
- Enable your Mac Address Book account in SoftPhoneApp > Preferences > Account
Settings. SoftPhoneApp pulls in the contact with the specified number already set up as a
softphone address.
- Select the Outlook profile you want to use from Outlook profile if you have more than
one profile.
- Open the contact in SoftPhoneApp and choose the specified phone number in the Primary
Presence field and click OK.
SoftPhoneApp creates the Outlook account.
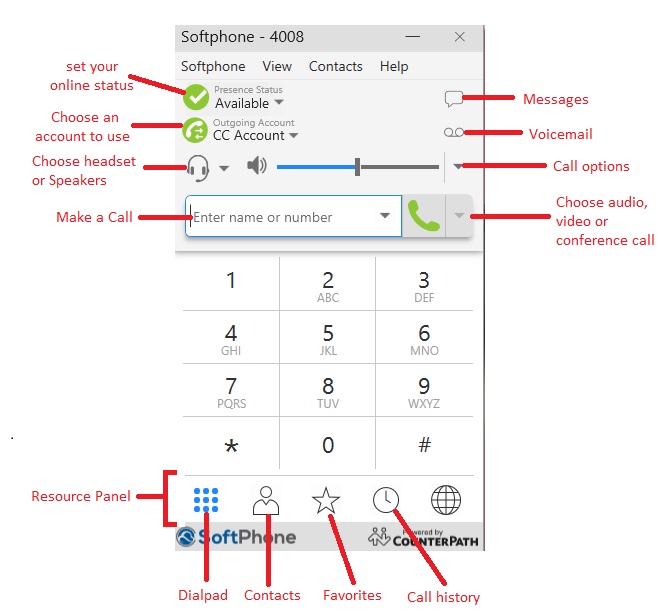
Using the SoftPhoneApp interface
You can navigate in SoftPhoneApp using the icons on the resource panel and the SoftPhoneApp
menu.
You can rearrange the order of the icons on the resource panel by dragging and dropping them
into your preferred order.
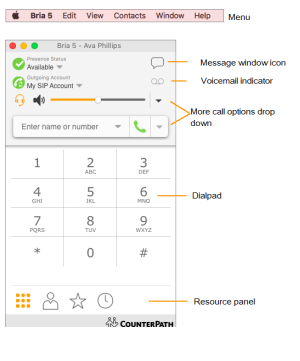
Windows
The Windows on-screen phone
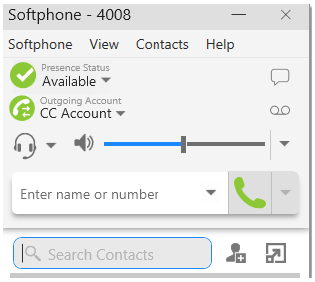
Compact view
To create the compact view, hide all the resources using the View menu.
SoftPhoneApp menus
The Softphone, View, Contacts, and Help menus are available in the SoftPhoneApp menu.
SoftPhone menus
- Account settings: Account settings apply to individual accounts. These settings control
how you interact with your VoIP service provider. See Configuring SoftPhoneApp –
Accounts for more information.
- Preferences: Preferences apply to all accounts. These settings control the way you work
with SoftPhoneApp. See Configuring SoftPhoneApp – Preferences for more information.
- Sign out: Sign out logs you out of SoftPhoneApp and SoftPhoneApp displays the log in
screen. This menu item only shows when you select Softphone > Preferences -
Application > Enable Sign In.
- Exit: Use Exit to shut down SoftPhoneApp. You can also use CTRL+Q.
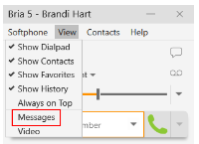
View menu
Use the View menu to change how SoftPhoneApp looks. In the View menu, you can show or
hide which resources are on the resource panel, open the Messages windows, and view your
Video.
Contacts menu
Use the Contacts menu to add contacts and groups, and to change the way your contacts are
displayed in Contacts and Favourites.
Help menu
The Help menu provides support for SoftPhoneApp. Use the Help menu to access
CommsChannel Technical Support, access the online user guide, troubleshoot problems, check
for updates, add features, and enter license key information.
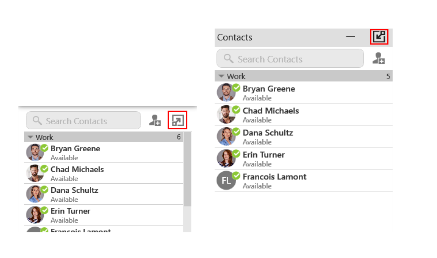
Detaching tabs
The Contacts, Favourites, History, and the Directory panels can all be detached from the onscreen phone into their own window. On the resource panel, click on the tab you want to detach
and then click Detach window. To return the window to the on-screen phone, click Move back
to main window
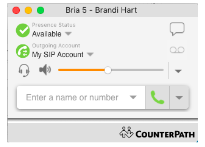
Mac
The Mac on-screen phone
Compact view
To create the compact view, hide all resources on the View menu.
SoftPhoneApp menus
The SoftPhoneApp menu
The SoftPhoneApp menu allows you to set up your accounts and preferences, change the look of
the SoftPhoneApp interface, work with contacts, and find support for SoftPhoneApp.
- Preferences: Preferences apply to all accounts. These settings control the way you work with SoftPhoneApp.
- Accounts Settings: Account settings are found in the Preferences menu. Account settings
apply to individual accounts. These settings control how you interact with your VoIP
service provider.
- Quit: Use Quit to shut down SoftPhoneApp. You can also use COMMAND+Q.
View menu
Use the View menu to change how SoftPhoneApp looks. In the View menu, you can show or
hide which resources are on the resource panel.
Windows menu
Use the Windows menu to Show Messages, Show Video, and Show Chat Rooms.
Contacts menu
Use the Contacts menu to add contacts and groups, and to change the way your contacts are
displayed in Contacts and Favourites.
Help menu
The Help menu provides support for SoftPhoneApp. Use the Help menu to access
CommsChannel Support Center, access the online user guide, troubleshoot problems, check for
updates, add features, and enter license key information.
Checking for SoftPhoneApp software updates
If you are in an enterprise, your system administrator should tell you about the policy for
checking for and installing updates.
Click Check for Updates on the Help menu to see if there is an update available. The Auto
Update (Windows) or the Auto Upgrade (Mac) window opens.
If a new version of the software is available, you can download it from this window. If no newer
version is available, this window informs you that your version is up to date.
Call
You can use SoftPhoneApp to place and receive audio and video calls, as well as host conference
calls. You can forward, transfer, and record calls.
A user must have at least one SIP account registered in order to place and receive calls.
In addition to a SIP account, a speaker and a microphone are necessary for audio calls. For video
calls, you also require a video camera to allow the remote parties to see your image.
SoftPhoneApp works with most USB video cameras.
You can test your devices in Softphone > Preferences > Devices (Windows) or SoftPhoneApp
> Preferences > Devices (Mac).
Placing an audio or video call
Place audio and video calls in SoftPhoneApp from the dialer, Contacts, Favourites, Directory
(if available), History, or Messages.
SoftPhoneApp has default actions for the call button and for double-clicking a contact. Set the
default actions in the Preferences > Application: Default Actions.
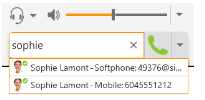
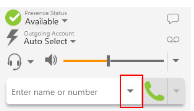
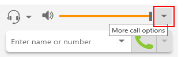
Using the dialer
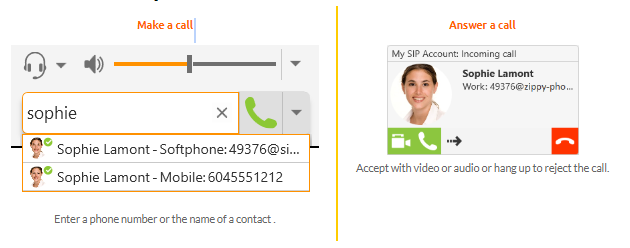
Enter a name or phone number in SoftPhoneApp's dialer to make a voice or video call from any
tab on the resource panel.
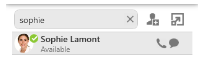
To place a call using the dialer using auto-complete
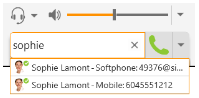
- Type the name, phone number, jid, or email of the person you want to call in the Enter
name or number field. As you type, SoftPhoneApp may display suggestions for
completing the entry.
- Press ENTER after typing the full name, phone number, jid, or email or use the up and
down arrow keys on your keyboard to move through the list of suggestions and press
ENTER or TAB to dial.
SoftPhoneApp makes the call.
To place a call using the dialer using Make a call or Make a video call
- Click Make a call or Make a video call after typing the full name, phone number, jid, or
email.

- Do one of the following:
SoftPhoneApp makes the call.
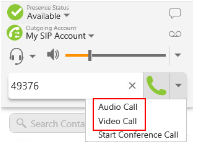
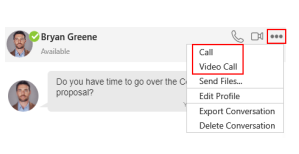
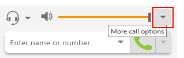
To place a call using the dialer using the More menu
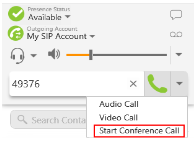
- Select Audio Call or Video Call from the More call options menu after typing the full
name, phone number, jid, or email.
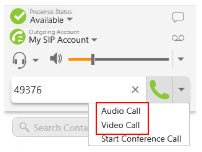
SoftPhoneApp makes the call.
Using redial
Redial a number by clicking Make a call or Make a video call or by using the List of recent
calls
To redial using Make a call or Make a video call
- Tap Make a call or Make a video call beside Enter name or number.

The last number dialed appears.
- Tap Make a call or Make a video call a second time.

SoftPhoneApp makes the call.
To redial using the More menu
- Tap Make a call or Make a video call beside Enter name or number.

The last number dialed appears.
- Select Audio Call or Video Call from the More call options menu.
SoftPhoneApp makes the call.
To redial using the List of recent calls
SoftPhoneApp places an audio call when you use the drop-down list even if the call was a video
call.
- Tap the List of recent calls drop-down arrow in the Enter name or number field. A list
of recent calls appears.
- Click the number or person you want to call.
SoftPhoneApp places the audio call.
Using Contacts, Favourites, or Directory
Make calls on SoftPhoneApp using the click-to-call button, single-click, double-click, or the
shortcut menu in Contacts, Favourites, or Directory (if available).
To place a call using the click-to-call button
- Type a name in Search Contacts, Search Favourites, or Search Directory or scroll
through Contacts, Favourites, or Directory and find the contact your want to call. You
can also use phone number, jid, or email.
- Hover on the contact you want to call to reveal the click-to-call button and click Call this
contact.
SoftPhoneApp makes the call.
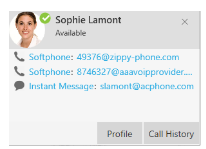
To place a call using the Contact Info flyout
- Type a name in Search Contacts, Search Favourites, or Search Directory or scroll
through Contacts, Favourites, or Directory and find the contact your want to call. You
can also use phone number, jid, or email.
- Click on the contact or number you want to call. A Contact Info flyout with the persons
information opens.
- Click the number you want to call in the Contact Info flyout.
SoftPhoneApp makes the call.
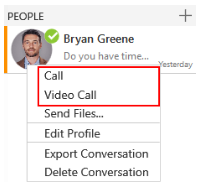
To place a call using the shortcut menu
- Type a name in Search Contacts, Search Favourites, or Search Directory or scroll
through Contacts, Favourites, or Directory and find the contact you want to call.
- Right-click (Windows) or CTRL+click (Mac) on the contact you want to call and click
Call or Video Call.
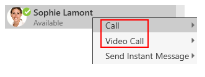
- If the contact has more than one number, click the number you want to call.

SoftPhoneApp makes the call.
To place a call using double-click
Double-click only works if the default action is set to
Call or
Make a video call. The action for
double-click is set in Preferences > Application: Default Actions.
- Type a name, phone number, jid, or email in Search Contacts, Search Favourites, or
Search Directory or scroll through Contacts, Favourites, or Directory to find a contact.
- Double-click the contact or number that you want to call.
SoftPhoneApp makes the call.
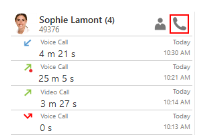
Using History
Make calls on SoftPhoneApp from History using Make a call, using the shortcut menu, or
using the Contact Info flyout.
Making a call from the Contact Info flyout only works if the person is one of your Contacts.
You may want to use the Contact Info flyout when the person you want to call is in History but
you want to reach them at a different number than the one in History.
To place a call using Make a call
- Type a name in the Search History or scroll through History and find a grouped entry
with the contact and number you want to call.
- Click on the group to expand it.

- Click Make a call.
SoftPhoneApp makes the call.
To place a call using the shortcut menu
- Type a name in the Search History or scroll through History and find a grouped entry
with the contact and number you want to call.
- Right-click (Windows) or CTRL+click (Mac) on the History group and click Call or
Video Call.
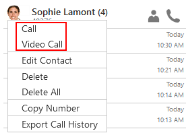
SoftPhoneApp makes the call.
To place a call using the Contact Info flyout
- Type a name in the Search History or scroll through History and find a grouped entry
with the contact and number you want to call.
- Click Contact Info.

- Click the number on the Contact Info flyout that you want to call.
SoftPhoneApp makes the call.
Using Messages
From the Messages windows, call the message sender or call a number in a message.
To place a call using Make a call and Make a video call
- Bring an IM into focus from the person you want to call by clicking on the message or
entering the person's name in the Search Messages field and clicking on the message.

- Click Make a call or Make a video call in the IM header.

SoftPhoneApp makes the call to the default number for the contact.
To place a call using the More menu
- Bring the IM into focus by clicking on the IM or entering the person's name in the Search
Messages field and clicking on the message.
- Click More options for this contact (Windows) or More options for this conversation
(Mac) in the IM header. If the person has more than one phone number, choose the phone
number you want to call.
SoftPhoneApp makes the call to the default number for the contact.
To place a call using the shortcut menu (Windows only)
- Right-click on an IM and select Call or Video call. If the person has more than one phone
number, choose the phone number you want to call.
SoftPhoneApp makes the call.
To place a call to a number sent in an message
- Click on the number you received in an IM.

SoftPhoneApp makes the call.
From Microsoft Outlook
If you are using Outlook integration with SoftPhoneApp, you can place calls directly from
Outlook.
You can place an audio or video call from the mini-contact card to an Outlook contact that you
have a phone number or softphone number for.
To place a call
- Hover over a person's name anywhere in Outlook. The mini-contact card appears.
- Click on Call or Start video call.

SoftPhoneApp places the call or video call and opens the call panel. If you clicked
Start video
call, SoftPhoneApp opens the
Video window if the remote party answers the call with video.
If a contact has more than one number, you can choose the number you want to call.
To place a call to a contact with multiple numbers
- Click the drop-down arrow beside Call or Start video call and select the number that you
want to call.

SoftPhoneApp places the call or video call and opens the call panel. If you clicked
Start video
call, SoftPhoneApp opens the
Video window if the remote party answers the call with video.
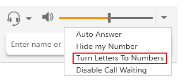
Changing letters to numbers
Some phone numbers are given with words to help you remember them - "1-800-numbers".
Rather than convert the letters to numbers - n=6, u=8, m=6, - to get 1-800-686-2377 - you
can type letters into Enter name or number and SoftPhoneApp will convert the letters to
numbers when placing the call.
Turn Letters to Numbers is automatically turned off when you shut down or log off.
Hiding your identity
You can hide your identity on a call so that the remote party will not see your name or number
on their phone. Anonymous calling is automatically turned off when you shut down or log off.
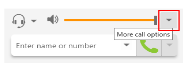
To hide your number
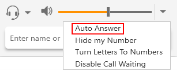
- Click More call options.

- Select Hide my Number
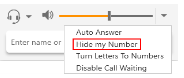
Anonymous Calling is enabled is displayed beside More call options and a check mark
appears beside Hide my Number on the More call options drop-down menu. Your ID
will be hidden for all outgoing calls until you turn off anonymous calling.

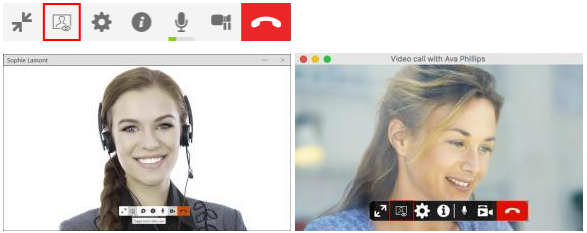
Changing video options
Video can be added or removed from an established call. If the remote party starts sending video,
your video window opens automatically and their video plays. Your video is only sent to the
remote party if you add it to the call.
To add video to an audio call
- When you are ready to stop using SoftPhoneApp, you need to exit SoftPhoneApp. If you simply
close the SoftPhoneApp on screen phone, SoftPhoneApp continues to run in the background.
SoftPhoneApp sends your video to the remote party. The remote party may or may not send their
video to you.
To stop and resume video
- Click the Pause sending video icon at the bottom of the call panel or the video window to
pause or end your video. You can also close the video windows to stop sending video.
Closing the video window does not end the call.

- Click Start Video at the bottom of the call panel or on the video window toolbar or the
open the video window to resume sending your video.
SoftPhoneApp starts or stops sending your video.
To show and hide the video preview
SoftPhoneApp can show you a preview of the video you are sending.
- Click on the video window if it is not in focus and hover over the video window.
- Click the Toggle local video view icon.
SoftPhoneApp toggles the local video view on and off

SoftPhoneApp starts or stops sending your video.
To expand and exit full screen video
- Click on the video window if it is not in focus and hover over the video window.
- To view in full screen click the Full screen or press F11 (Windows only).

- To close full screen view click Exit full screen or press ESC (Mac only).

The video window screen changes size.
To change video settings
- Click the Camera settings icon at the bottom of the video window.
- Use the drop down menus to change your video device or change your video resolution.
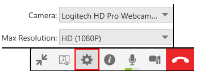
SoftPhoneApp changes the video settings.
Placing simultaneous calls
You can make up to five concurrent calls on SoftPhoneApp.
To place a second call
To place a second call, use any of the methods for placing an audio or video call when you have
a call established. SoftPhoneApp automatically puts the first call on hold and dials the second
call.
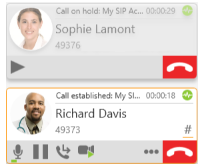
SoftPhoneApp displays a call panel for each call.
To swap between calls
- Click Take this call off hold on the call you want to switch to.
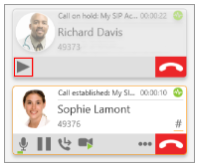
SoftPhoneApp puts the active call on hold and switches to the other call.
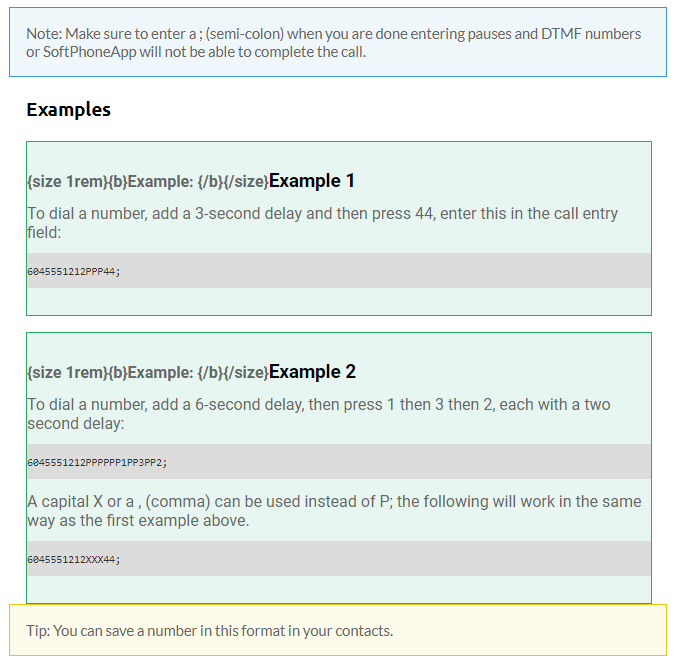
Dealing with an auto attendant (Pause dialing)
You can use DTMF or pause dialing for auto attendant when you dial call or during a call.
Using DTMF when you dial a call
If you know that your call will be answered by an auto attendant and you know what menu items
you will choose, you can include those menu items (DTMF) in the phone number when you dial
it.
Use the DTMF dialing rules to append the number you dial.
DTMF dialing rules
- Include at least one capital P before the first DTMF number. Each P causes SoftPhoneApp
to pause for one second before sending the next character.
- You can include other P's.
- At the end of the input, include a ; (semi-colon).
Using DTMF during a call
Once you have dialed a call, you may need to use DTMF to enter an extension number, follow
voice prompts, or enter a conference code.
Handling an incoming call
SoftPhoneApp must be running to answer incoming calls. It can be running in the system tray. If
SoftPhoneApp is not running, incoming calls may be directed to voice mail if you have this
service. Check with your VoIP service provider or your system administrator.
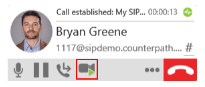
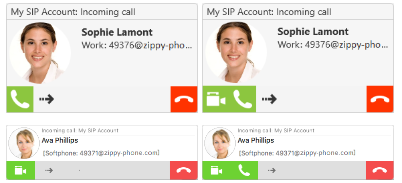
When SoftPhoneApp is in the foreground, the call appears in the call panel in the SoftPhoneApp
interface. When SoftPhoneApp is in the either the foreground or the background, you may also
receive a notification for the incoming call depending on your settings. To receive notifications
on a Mac, also set the system preferences.
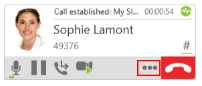
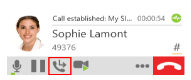
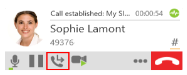
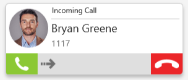
To answer a call on the call panel
- Click an action button
The DTMF field opens.
One of the following results occurs depending on the action button you choose:
Icon and Meaning - Windows
- Answer incoming call: The incoming audio call is answered with audio. If you were on
another call, SoftPhoneApp places the first call on hold.
- Answer incoming call with audio only: The incoming video call is answered with audio only.
If you were on another call, SoftPhoneApp places the first call on hold.
- Answer incoming call and start sending my video: The incoming video call is answered
with video. If you were on another call, SoftPhoneApp places the first call on hold.
- Forward this call to another person without answering: The incoming call is forwarded
without answering it first. A call entry field appears. Enter the name or number you want to
forward the call to and click Forward
- Refuse incoming call: The call is declined and the remote party gets a busy signal or the call
is forwarded to voice mail if you have this service.
Icon and Meaning - Mac
- Answer call: The incoming audio call is answered with audio. If you were on another call,
SoftPhoneApp places the first call on hold.
- Answer with audio only: The incoming video call is answered with audio only. If you were on
another call, SoftPhoneApp places the first call on hold.
- Answer with video: The incoming video call is answered with video. If you were on another
call, SoftPhoneApp places the first call on hold.
- Forward call: The incoming call is forwarded without answering it first. A call entry field
appears. Enter the name or number you want to forward the call to and click Forward Call.
- Reject call: The call is declined and the remote party gets a busy signal or the call is forwarded
to voice mail if you have this service.
Answering notifications
In Windows, you will receive Windows 10 interactive toast notifications or Windows 7 style
notifications. In Mac, you will receive banner style notifications or alert style notifications.
To use Windows interactive toast notifications, you have to enable Use Windows notifications
in Softphone > Preferences > Alerts & Sounds.
To answer Windows 10 interactive toast notifications
- Click Answer, Decline, or Decline with message in the interactive toast notification.
When you click Decline with message, the message you enter is sent to the caller as an IM.
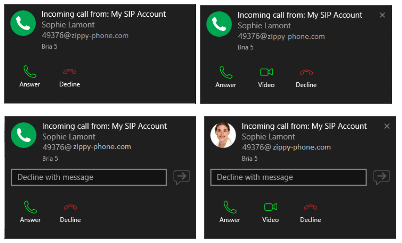
To answer Windows 7 style notifications
You can answer a call with the notification by clicking
Answer incoming call, Answer
incoming call and start sending my video, or
Refuse incoming call.

To answer Mac notifications
Banner style notifications appear briefly in the top corner of the screen. They will disappear on
their own. To answer a call, click on the notification. This brings SoftPhoneApp into the
foreground and you can answer the call using the call panel.
Alert styles notifications appear and remain on the screen until you take action on them. You can
click
Answer or
Decline on the alert. You can click anywhere else on the notification to bring
SoftPhoneApp into the foreground and answer the call using the call panel.

The notifications do not indicate whether the incoming call is an audio call or a video call. If the
incoming call is a video call, SoftPhoneApp will answer with video. If you do not want video,
you can stop sending video once the call is established.
Enabling auto answer
You can turn on Auto Answer so the call is automatically answered by SoftPhoneApp after a
specified period of time with no user intervention. Auto Answer is initially configured to answer
calls after 3 seconds. Go to Preferences > Calls to change the configuration.
You can enable this feature during a call and it takes effect right away. When the call is
established, SoftPhoneApp sends your audio only.
To enable Auto Answer
- Click More call options.
- Select Auto Answer.
Auto Answer is enabled is displayed beside
More call options and a check mark appears
beside the
Auto Answer on the
More call options drop-down menu. Any new incoming call
are automatically answered.

Disabling call waiting
You can turn on Disable Call Waiting so active calls are not interrupted by incoming calls. You
can enable this feature during a call and it will take effect right away. The calls will appear as
Missed Calls in the List of recent calls (Windows) or History (Mac). Any new incoming calls
ring busy (to the caller) or go straight to voice mail if you have this service.
To disable call waiting
- Click More call options.
- Select Disable call waiting.
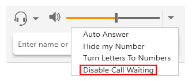
Call Waiting is disabled is displayed beside More call options and a check mark appears
beside the Disable call waiting on the More call options drop-down menu.

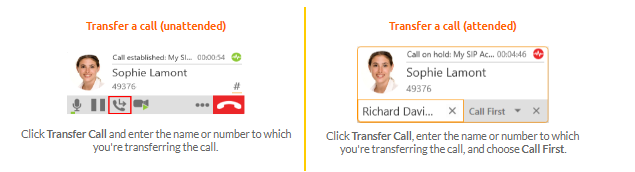
Transferring a call
There are two types of call transfers. A unattended or blind transfer occurs when you transfer a
call without talking to the target - the person you are sending the call to. An attended transfer
occurs when you talk to the target before transferring the call.
The SoftPhoneApp transfer button can be set with Transfer Now or to Call First as the default.
You can set the default in the Preferences: Application panel
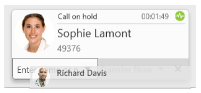
Unattended Transfer
In an unattended or blind transfer, you transfer the call to the target without talking to the target
first.
To transfer a call
- Click Transfer this call (Windows) or Transfer (Mac) at the bottom of the call panel.
SoftPhoneApp puts the call on hold.
- Type the name or number of the target, use the redial drop-down list, or drag the target's
contact into the Enter name or number field.
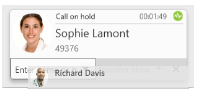
- Click Transfer Now if it is your default or click the drop-down arrow beside Call First
and click Transfer Now.
SoftPhoneApp attempts to transfer the call to the target. The call may end immediately or may
show
Transfer: Calling. If you see
Transfer: Calling, do not hang up. If the target does not
answer, the call will return to you.
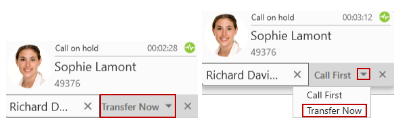
Attended Transfer
Transfer the call to the target after speaking to the target.
- Click Transfer this call (Windows) or Transfer (Mac) at the bottom of the call panel.
The call is put on hold.
- Type the name or number of the target, use the redial drop-down menu, or drag the target's
contact into the Enter name or number field.
- Click Call First if it is your default or click the drop-down arrow beside Transfer Now
and click Call First.
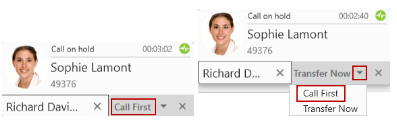
SoftPhoneApp phones the target. When the target answers, Transfer Now is enabled
- Speak to the target. If the target wants to take the call, click Transfer Now (Windows) or
Transfer now (Mac). If the target does not want to take the call, click the X at the bottom
of the call panel.
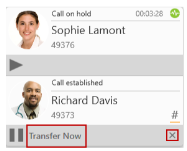
SoftPhoneApp transfers the call to the target if the target accepts the call.
Forwarding a call
You can forward an incoming call instead of answering it. Calls show up as missed calls in
History.
To forward a call
- Click Forward call on the call panel.
- Type the name or number of the target, use the redial drop-down list, or drag the target's
contact into the Enter name or number field.
SoftPhoneApp forwards your call.
Encrypting a call
The outgoing call may be encrypted depending on your security settings.
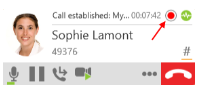
- If an encrypted call is established, the security lock appears on the call panel.
- If an unencrypted call is established, no encryption icon appears.

Recording a call
You can record the audio portion of a one-to-one call or a conference call.
Files created when recording
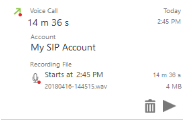
Recording are saved as .wav files on your computer. The location to save recordings can by set
by your system administrator or in the Preferences > Files and web tabs panel. (Mac). If you
do not see Preferences > Files and web tabs, talk to your system administrator.
Files created for conference calls
Multiple files may be created depending on how and when you start recording. If you start
recording from the beginning of a conference call and continue recording until the call ends, one
file is created.
If you separate a participant from the conference call and have a one-to-one call, the recording
continues until the end of the one-to-one call. Two files are created: one for the conference call
and the other for the one-to-one call.
Files created when forming conference calls from one-to-one calls
If you are recording one-to-one calls and you merge them to form a conference call, all the
individual recordings stop and a new recording is created for the conference call.
If you are recording one-to-one calls and you add them to an existing conference call, all the
individual recordings stop. If the conference call was being recording before the merge, the
recording of the conference call continues.
Creating a call recording
You can record the audio portion of a call in progress.
To start a call recording
Stopping recording a call
You can stop recording a call using the More menu or using the recording icon.
To stop recoding a call using the More menu
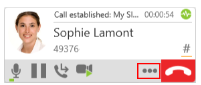
- Click More options for handling this call (Windows) or More options (Mac).
- Click Stop Call Recording to end the call recording.

SoftPhoneApp stops recording the call.
Using the Stop Call Recording
- Click the Stop Call Recording.
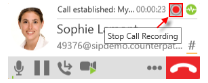
SoftPhoneApp stops recording the call.
The first time you record a call, a
Save Call Recording dialog appears. The dialog displays the
Recording name and the
Saved in location. You can select
Don't show this dialog again if
you do not want to see the dialog after every recorded call. Click
Open Folder to open the folder
where the file is saved.

Playing back a call recording
You can play a call recording back directly from SoftPhoneApp using History or you can use a
file explorer and your default app to play the recording.
To play back a recording using History
To play back a recording using file explorer
- Locate the .wav file from the location it was saved in.
- Double-click on the file. The file opens in your default audio player.
- Use the controls in the audio player to play back the recording.
The recording is played in the default audio player.
Ending a call
To end a one-to-one or conference call, click End call on the bottom of the call panel. The call
panel closes after a few seconds.
To end a video call, click End call on the bottom of the call panel or click End call in the
video window tool bar.
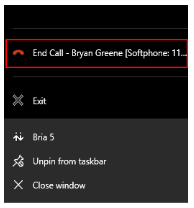
In Windows, you can end a call by right-clicking the SoftPhoneApp icon in the taskbar and
clicking End Call.
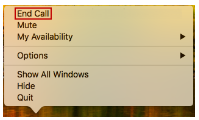
In Mac, you can end a call by using CONTROL + click on the SoftPhoneApp icon in the dock
and click End Call.
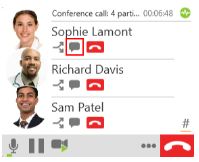
Conference calls
Use SoftPhoneApp for six-party audio conferencing and six-party video conferencing (you and
five other participants) where you are the host.
With SoftPhoneApp, you can create a conference call, add participants to an existing conference
call, remove a participant from a conference call, send instant messages to conference
participants, and place the conference call on hold.
Creating a conference call
You can create a conference call or you can add participants to an existing call. Once a
conference call is created, you can add additional participants.
Creating a conference call
Create a conference call without an established call.
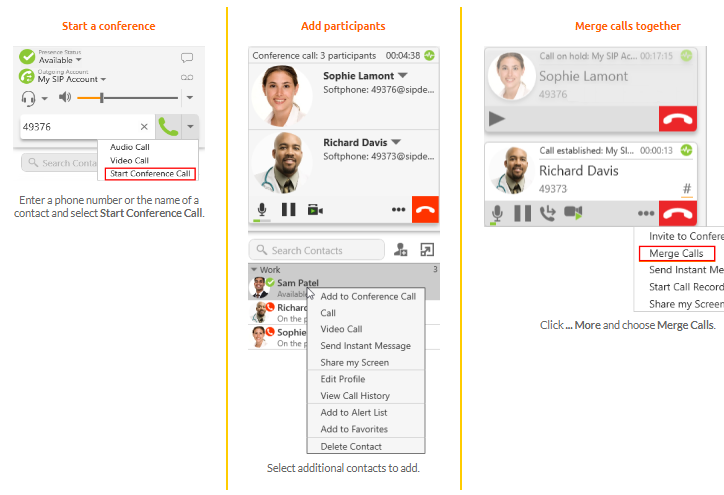
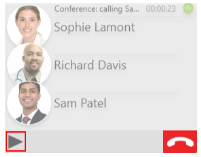
To create a conference call using the dialer
Adding participants to an established call
You can add participants to a one-on-one call or to an existing conference call.
Adding participants to an active call
You can use the More options for handling this call(Windows) or More options (Mac) from
an existing one-on-one call or from an existing conference call.
Using the More menu
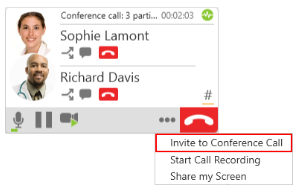
- Click More options for handling this call (Windows) or More options (Mac) and click
Invite to Conference Call from an established call.
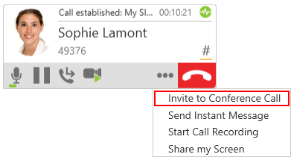
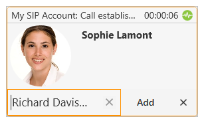
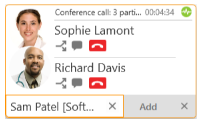
- Type a name or a number, use the redial drop-down, or drag a contact into Enter name or
number and click Add. SoftPhoneApp adds the new participant.
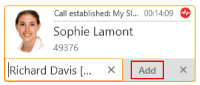
- Repeat steps 1 through 3 until you have added all the participants to the conference call.
SoftPhoneApp creates a conference call.

Merging existing calls
You can create a conference call by merging two or more existing calls.
To add participants by merging calls
- Establish the calls you want to merge.
- On the active call, click More options for handling this call (Windows) or More
options (Mac) and click Merge Calls.
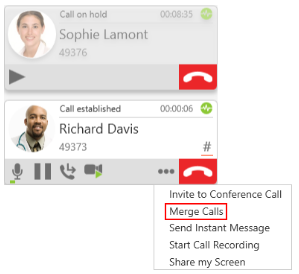
SoftPhoneApp creates a conference call.

Using the shortcut menu in Contacts or Favourites
You can add participants to an established one-on-one call or to an established conference call
using the shortcut menu in Contacts or Favourites
Using the shortcut menu in Contacts or Favourites
You can add participants to an established one-on-one call or to an established conference call
using the shortcut menu in Contacts or Favourites.
To add participant using the shortcut menu
- During an established call, go to the Contacts or Favourites panel.
- Right-click (Windows) or CTRL+click (Mac) on a Contact or Favorite and click Add to
Call.

SoftPhoneApp creates a conference call.

External conference call
To join a conference call external to SoftPhoneApp, you may need to enter DTMF digits.
To use DTMF during a call
- Click Show/Hide DTMF.

The DTMF field opens.

- Type the required DTMF numbers.

- Click Show/Hide DTMF to close the DTMF field.

SoftPhoneApp plays the DTMF tones
Video conference calls
To use video conferencing, a video camera is necessary to allow the remote parties to see your
image. SoftPhoneApp works with most USB video cameras. Video is sent to all participants in a
conference call.
Including video in a conference call
When you start a conference call from established calls, video is automatically included if at
least one of the established call includes video.
When you create a new conference call, video is not included.
To add video to a conference call
- Click Start Video.

Video is sent to all conference participants. Participants can choose whether to share their own
video.
How video is shared
The conference host, the person who started the conference call, serves as the host for the video
feed. The video that the host sees is automatically sent to all participants.
If the conference host pauses or stops the video, the other participants no longer receive video.
One person does not have video
Participants that have video see Video beside their name. If there are any participants that do not
have video, the host must stop and start the video.

Sending an instant message to a conference
participant
Send individual instant message (IM) to a conference participant.
To send a participant an instant message (IM)
during the conference call
- On an established conference call, click Send Instant Message beside the name of the
participant.
The Messages window opens.
- Type the message in the Compose Message field

- Click Send Message or press ENTER
SoftPhoneApp sends the IM.
Putting a conference on hold
With SoftPhoneApp, you can put a conference call on hold.
To put a conference call on hold
- Click Put conference call on hold at the bottom of the conference call panel.

SoftPhoneApp places the conference call on hold.
To resume a conference call
- Click Take all participants off hold at the bottom of the conference call panel.
SoftPhoneApp places the conference call on hold.
Speaking to a participant separately
During a conference call, you can speak to one of the conference participants separately while
maintaining the conference call.
To speak to one participant in a conference call
- Click Separate Calls beside the participant you want to speak to.

The conference is split into two calls. When you are finished speaking to the separate participant,
you can merge the two calls back into the conference call or end the one-on-one call and return
to the other conference call.
Removing a participant or ending a conference call
You can remove a participant from the conference call and continue with call or you can end the
conference call.
To remove a participant
- Tap End call beside the participant you want to remove.

SoftPhoneApp ends the call with the participant. The call continues with the remaining
participants.
To end a conference all
- Click End call from the conference call panel.

SoftPhoneApp ends the conference.
Accessing voice mail
If you have set up voice mail options, you can use
SoftPhoneApp to access your voice mail services.
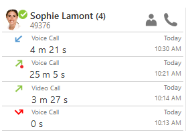
When you have a new message, an icon showing the number of messages shows on Voice
messages (Windows) or Voice Mail (Mac).
To listen to your messages
- Click Voice messages (Windows) or Voice Mail (Mac).
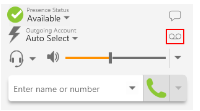
SoftPhoneApp plays your messages.
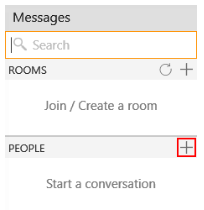
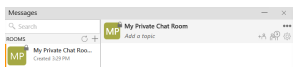
Messaging
There are two types of messages in SoftPhoneApp - instant messages (IMs) and chat rooms. IMs
are messages that you send to an individual contact. Chat rooms have multiple members and
allow you to send messages to all the members of the room. IM's are found in the People section
of the Messages window. Chat rooms are found in the Room section.
You can send IM's to any contact who has a softphone
You can use emoticons and formatting in your IM's and chat rooms. Use CTRL+B for bold,
CTRL+I for Italic, and CTRL+U for underline on Windows. Use COMMAND+B for bold,
COMMAND+I for Italic, and COMMAND+U for underline for Mac.
By default, SHIFT+ENTER (for Windows) or CONTROL + ENTER (for Mac) inserts a new line
in a message and ENTER sends the message. You can modify this behavior in Preferences >
Application panel: Messages & Presence.
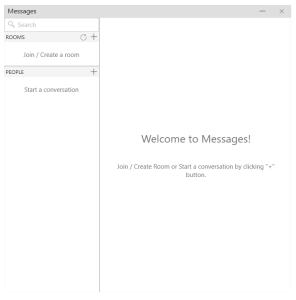
Opening the Messages window
There are several ways that you can open the Messages window.
Windows
- Click Show the messages window
- Keyboard shortcut: CTRL+SHIFT+M
- Select View > Messages
- Click on an IM notification

Mac
- Click Show the messages window.
- Select Window > Show Messages
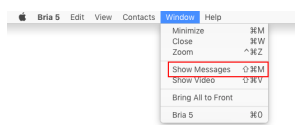
- Click on an IM notification

Instant messages
You can send instant messages (IMs) to a contact who has a softphone address You can delete the entire IM session.
To send messages to more than one person, see Chat rooms.
Sending and receiving instant messages
Sending an instant message
Instant messages (IMs) can be sent from the Messages window, the Contacts panel, the
Favourites panel, or from an active call.
Set the action for clicking ENTER while typing a message in Preferences > Application panel:
Messages & Presence.
Sending an IM from the Messages window
From the Messages window, you can start a new IM, send another message on an existing
conversation, or send an IM to a member of a chat room.
To start a new IM
- Click New Conversation in the People section of the Messages window.
- Type a name into Add recipients. As you type, SoftPhoneApp may display suggestions
for completing the entry. Click on the person or press ENTER to select the recipient.

- Type your message in Compose Message.

- Click Send Message.
SoftPhoneApp sends the IM.
Add to an existing IM conversation
- Click on an existing conversation in the People section of the Messages window.

- Type your message in Compose Message.

- Click Send Message.
SoftPhoneApp sends the IM.
Sending an IM from the Contacts or the Favourites panel
From the Contacts or Favourites panel, you can start a new IM using the shortcut menu or using click-to-message.
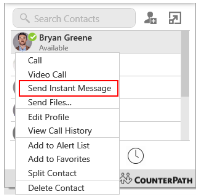
To send an IM using the shortcut menu
- On the Contacts or Favourites panel, right-click (Windows) or CONTROL+Click (Mac)
on a contact or a favorite and select Send Instant Message from the shortcut menu. If
there is more than one IM address, select the one you want to use.
- Type your message in Compose Message.

- Click Send Message.
SoftPhoneApp sends the IM
To send an IM using click-to-message
- On the Contacts or Favourites panel, hover on the contact you want to message to reveal
the click-to-message button. Click Instant message this person.

- Type your message in Compose Message.

- Click Send Message.
SoftPhoneApp sends the IM.
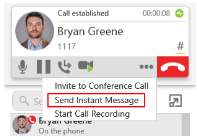
Sending an IM from an active call
From an active call, you can send a message using More options for handling this call
(Windows) or More options (Mac).
Receiving an instant message
When you receive an IM, the Messages window opens or a notification appears. To control the
type of notification, go to Preferences >Alerts & Sounds (Windows) or Preferences > Alerts
(Mac).
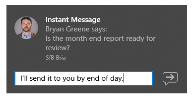
Windows 10 interactive toast notification
You can type your response directly into a Windows 10 interactive toast notification or you can
click on the notification to open it in the
Messages window.
Windows 7 and Mac notifications
You click on the Windows 7 or a Mac IM notification to open it in the
Messages window.

Deleting instant messages
You can delete an IM conversation from SoftPhoneApp. Before you delete a conversation, you
may want to export it.
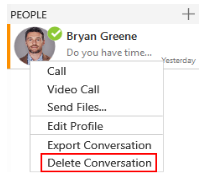
To delete a conversation using Delete Conversation
- Click Delete Conversation beside the session.
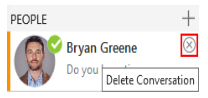
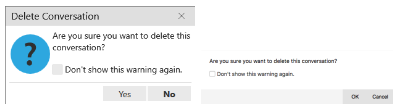
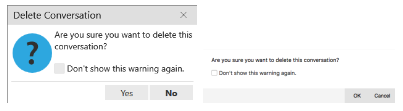
A Delete Conversation dialog opens.
- Click Yes (Windows) or OK (Mac).
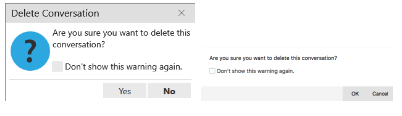
A Delete Conversation dialog opens.
To delete a conversation using the More menu
- Click on the session, click More options for this contact (Windows) or More options
for this conversation (Mac) and click Delete Conversation.

A Delete Conversation dialog opens.
- Click Yes (Windows) or OK (Mac).
SoftPhoneApp deletes the session.
To delete a conversation using the shortcut menu
- Right-click on the session and click Delete Conversation.
A Delete Conversation dialog opens.
- Click Yes (Windows) or OK (Mac).
SoftPhoneApp deletes the session.

Chat rooms
Chat rooms are used when sending messages to multiple recipients. Chat rooms can be private or
public. Private rooms can only be joined by invitation. Public rooms can be joined by anyone in
your group.
You can:
- Create chat room.
- Join a chat room.
- Set up the type of notifications you want to receive for each chat room.
- Use mentions to get the attention of a specific chat room member
- You can delete or leave a chat room.
Chat room properties
Each chat room has a set of properties. Some are required and some are optional.
Required chat room properties
Room name: Each room must have a unique room name. Up to 40 characters long.
Room Type: A room can be private or public. Private rooms are unlisted and can be joined by
invitation only. Public rooms are displayed in the list of chat rooms that you can join.
Room owner: The name of the person that created the room.
Optional chat room properties
Members: The people you are inviting to the room or the people already in the room.
Description:Up to 140 characters long that can be edited by the room owner
Topic:A brief description of what is currently being discussed in the group that can be edited by
anyone. Up to 140 characters long.
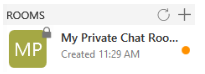
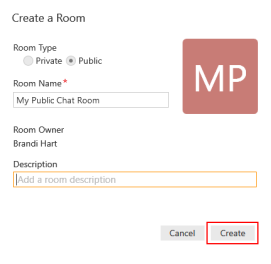
Creating a chat room
All SoftPhoneApp users can create new private or public chat rooms. Public chat rooms can be
joined by anyone. Private chat rooms can only be joined by an invitation from the Room Owner.
Chat rooms are assigned an avatar using the initials from Room Name. As you type in Room
Name, the color of the avatar changes as you type. The resulting color is assigned to the chat
room. Room Name can be up to 40 characters long and must be unique. Room Name is case
sensitive.
Description is an optional field. Description can be up to 140 characters long.
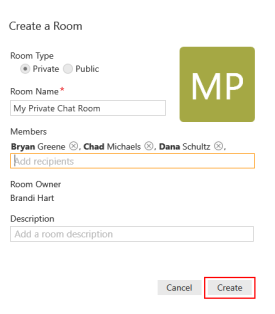
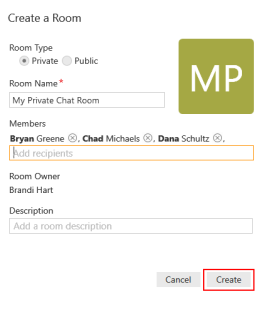
To create a private chat room in Rooms
- Click Join / Create a room and click Create a room on the Rooms section of the
Messages window.

- Select Private for the Room Type.
- Type in a Room Name.
- Start typing the name of a contact you want to add to the room. As you type a name,
SoftPhoneApp shows a list of suggestions. Select the person you want to invite from the
list.

If you want to remove someone from Members before you create the room, click
Remove.
- Repeat the previous step until all the members you want to add are shown in Members.
- If desired, enter a brief Description of the room. This field is optional.

- Click Create
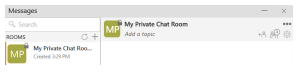
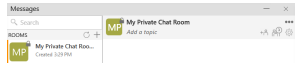
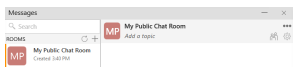
SoftPhoneApp creates the chat room and adds it to the
Rooms section of the
Messages window.
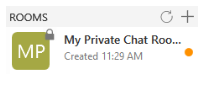
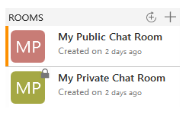
The
Members you invited are automatically added to the room. The lock on the avatar for the
room indicates this is a private chat room.
To create a private chat room in People
- Click on the IM in the People section of the Messages window.

- In the IM header, click Create a Chat Room.

- Select Private for the Room Type.
- The Room Name defaults to your display name. If desired, type in a new Room Name.
- The person from the one-to-one chat is automatically added to Members.
Start typing the name of another a contact you want to add to the room. As you type a
name, SoftPhoneApp shows a list of suggestions. Select the person you want to invite from
the list.

If you want to remove someone from Members before you create the chat room, click
Remove.

- Repeat the previous step until all the members you want to add are shown in Members.
- If desired, enter a brief Description of the room. This field is optional.
- Click Create.
SoftPhoneApp creates the chat room and adds it to the
Rooms section of the
Messages window.
The
Members you invited are automatically added to the room. The lock on the avatar for the
room indicates this is a private chat room.
To create a private chat room in Contacts or Favourites
- . Click a group, or use SHIFT+Click, CTRL+Click (Windows), COMMAND+Click (Mac) or
a combination to select two or more contacts, Favourites, or groups.
- Right-click (Windows) or CTRL+click (Mac) and select Create a Chat Room....
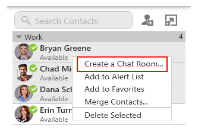 Create a Room opens in the Messages window.
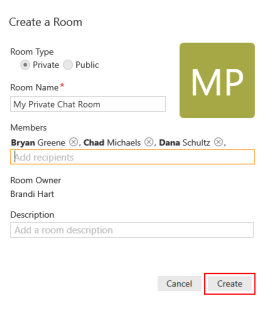
- Select Private for the Room Type.
- Room Name defaults to your display name followed by Room. You can edit Room Name
by typing in a new name.
- . The contacts you selected are listed in Members.
If you want to add any additional , start typing the name of a participant you want to add
to the room. As you type a name, SoftPhoneApp shows a list of suggestions. Select the
person you want to invite from the list.

If you want to remove someone from Members before you create the room, click
Remove.

- Repeat the previous step until all the members you want to add are shown in Members.
- If desired, enter a brief Description of the room. This field is optional.
- Click Create.
SoftPhoneApp creates the chat room and adds it to the
Rooms section of the
Messages window.
The
Members you invited are automatically added to the room. The lock on the avatar for the
room indicates this is a private chat room.
Creating public chat rooms
You can create a public chat room from the Messages window, Contacts or Favourites.
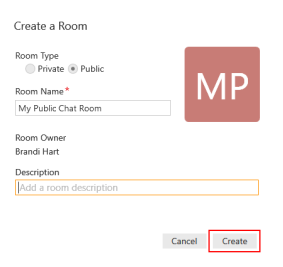
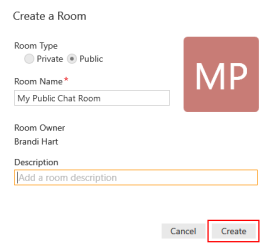
To create a public chat room
- Click + and click Create a room on the Rooms section of the Messages window.
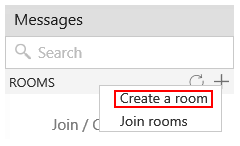
- Select Public for the Room Type.
- Type in a Room Name.
- If desired, enter a brief Description of the room. This field is optional.
- Click Create
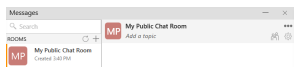
SoftPhoneApp creates the chat room and adds it to the
Rooms section of the
Messages window.
Your can join the room.
To create a public chat room in People
- Click on the IM in the People section of the Messages window.

- In the IM header, click Create a Chat Room.

- Select Public for the Room Type.
- The Room Name defaults to your display name. If desired, type in a different Room
Name.
- If desired, enter a brief Description of the room. This field is optional.
- Click Create.
SoftPhoneApp creates the chat room and adds it to the
Rooms section of the
Messages window.
Your can join the room.
To create a public chat room in Contacts or Favourites
- Right-click (Windows) or CTRL+click (Mac) on any Contact or Favorite and select
Create a Chat Room...
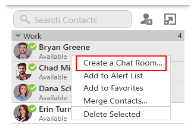
Create a Room opens in the Messages window.
- Select Public for the Room Type.
- The Room Name defaults to your display name. If desired, type in a different Room
Name.
- If desired, enter a brief description of the room. This field is optional.
- Click Create.
SoftPhoneApp creates the chat room and adds it to the
Rooms section of the
Messages window.
Your can join the room.


Joining a chat room
There are two types of chat rooms - public and private. Anyone can join a public chat room. You
must be invited to join a private chat room. SoftPhoneApp automatically accepts the invitation to
private chat rooms.
When you join a chat room, you can see the previous messages in the chat room.
Joining a private chat room
In order to join a private chat room, you have to added as a member. You automatically join the
room when the Room Owner invites you and the private room is shown in Rooms section of the
Messages window with a dot to indicate it is new. If you leave a private chat room and want to
rejoin, you need to be invited to the room again.
Joining a public chat room
You can join existing public chat rooms that were created by one of your.
To join a public chat room
- Click Join / Create a room and click Join rooms on the Rooms section of the Messages
window.
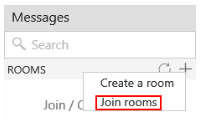
SoftPhoneApp displays a list of public rooms.
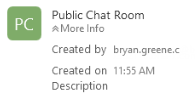
- Click Join room beside the public room you want to join. If the list of rooms is long, you
can type room name and description keywords in Search.

Click on More Info to view who created the room, when is was created, and the
Description (if one was added).
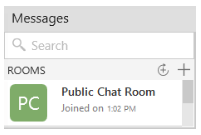
- If you want to join multiple rooms at the same time, click Join room beside all the public
rooms you want to join. Once you have added all the rooms you want to join, click Close.

The chat room is added to the Rooms section of the Messages window.
Editing chat rooms
After a room has been created, the Room Owner - the person that created the room - can
change the Room Name and Description, add new members, and add a Topic to a room. These
changes are made from the Messages window.
Members of the room can also change the Topic.
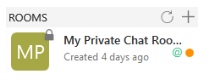
Changing the Room Name and Description
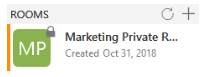
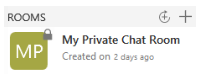
The Room Owner can change the Room Name and Description. The chat rooms you can edit
say Created.
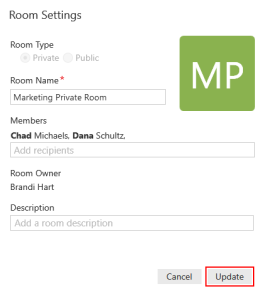
To change the Room Name and Description
- Click on the room in the Rooms section of the Messages window

- In the room header, click Settings.

- Type a new Room Name or Description.
- Click Update.
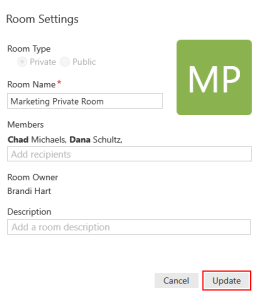
Bria updates the Room Name and Description.
Adding a Topic to a room
Room members can add a Topic for both public and private chat rooms. You might want to add a
Topic to indicate what the current discussion is about. Topics do not show up in search results.
To add a Topic to a room
- Click on the chat room in the Rooms section of the Messages window.
- Click on Add a topic or on the existing topic

- Type in the new Topic. SoftPhoneApp displays the new topic in the chat room header when the chat room is selected.

Chat room notifications
SoftPhoneApp has several ways to indicate when there is a new message or you have been
mentioned in a chat room you are a member of. You can customize the notifications the you
receive in Preferences >Alerts & Sounds (Windows) or Preferences > Alerts (Mac) and for
each chat room.
Types of notifications
Changing chat room notifications
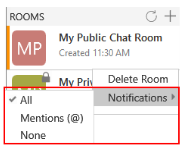
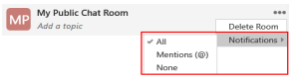
You can change the notifications you receive for each individual chat room. Choose from:
- All: SoftPhoneApp notifies you if there is a new message or you have been mentioned in a
chat room you are a member of.
- Mention (@): SoftPhoneApp notifies you if you are mentioned in a chat room you are a
member of.
- None: SoftPhoneApp does not notify you that there is a new message or the you have been
mentioned in a chat room you are a member of.
To change room notifications from the Rooms list
- Right-click (Windows) or CTRL+click (Mac) on the chat room in the Rooms section of the
Messages window.
- Send a notification or opens the Messages window where the user has been mentioned in a
message if Notifications is set to All or to Mentions (@) for the chat room.
SoftPhoneApp updates your notification preferences for the room.
To change room notifications from room options
- Click on the chat room in the Rooms section of the Messages window.
- Click More options for this conversation.

- Select Notifications and the type of notification that you want to receive - All, Mentions
(@), or None.
SoftPhoneApp updates your notification preferences for the room.
Sending and receiving messages
Sending a message
Once you have created or joined a chat room, you can start sending messages.
To send a chat room message
- Click on the chat room in the Rooms section of the Messages window.
- Type you message in Compose Message.

- Click Send Message.
SoftPhoneApp sends the chat room message.
Receiving a message
Your chat room notification settings determine the type of alert you see when there is a new
message on a chat room.
To view an new message
- Click on the chat room in the Rooms section of the Messages window.
- Click on the notification.
SoftPhoneApp displays the chat room messages.
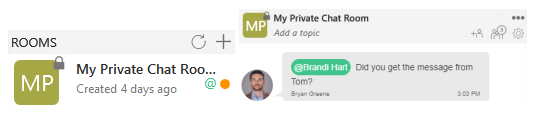
Mentions
If you want to get the attention of a room member, you can use mentions. The person that is
mentioned sees an indicator beside the chat room in the
Rooms section of the
Messages window
and sees their name highlighted in the chat room messages.
 To mention a person
- Click on the chat room in the Rooms section of the Messages window.
- Type @ followed by the name of the person you want to mention in Compose Message.
As you type, SoftPhoneApp offers suggestions. Select the name of the person from the list
of suggestions.

- Type you message in Compose Message.

- Click Send Message.
SoftPhoneApp sends the chat room message. The person mentioned in the message sees an
indicator that they have been mentioned.
Tip: You can use @Everyone to send a menOon to all members of a private chat room and all
acOve members of a public chat room.
Chat room members
Members of a chat room can see who is in the room. The owner of the chat room can add new
members to a private room. The room owner can also re-invite members to a private chat room.
Seeing who is in a room
As a member of a chat room, you can see who is in the room. Private chat rooms display
everyone who is a member of the chat room along with their status. Public chat rooms display
the room members that are currently online.
To see who is in a chat room
- Click on the chat room in the Rooms section of the Messages window.
- Click Members in the chat room header. The number indicates the number of members in
the room.

The members list opens in the chat room panel. Each member of the chat room is displayed with
their status. Hover over the avatar for the members name. Click on the member to see the contact
details.

Adding new members to a private chat room
The room owner can add new members to a private chat room from the room header or in the
chat room Settings. Once you have invited a person to join the chat room, you cannot remove a
person from the room.
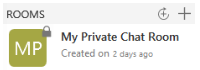
To add new members to a room from the chat room header
- Click on the chat room in the Rooms section of the Messages window. The chat rooms
you can add members to say Created.
- Click Add members in the chat room header.

- Start typing the name of a contact you want to add to the chat room. As you type a name,
SoftPhoneApp shows a list of suggestions. Select the person you want to invite from the
list.

- Click Add members to add the contact. Click Cancel if you do not want to add the
contact.

SoftPhoneApp adds the contact to the chat room.
To add new members to a room from chat room Settings
- Click on the chat room in the Rooms section of the Messages window. The chat rooms
you can add members to say Created.

- In the room header, click Settings.

- Start typing the name of a contact you want to add to the chat room in Add recipients. As
you type a name, SoftPhoneApp shows a list of suggestions. Select the person you want to
invite from the list.

- Click Update.
SoftPhoneApp adds the contact to the chat room.
Re-inviting a member
The Member you re-invited is automatically added to the room.
Leaving or deleting a chat room
You can leave a private or public chat room without closing it if you are not the room owner. If
you are the room owner, you can delete a private or a public chat room.
Tip: Before you leave or delete a room, you may want to export the conversaOon.
Leaving a chat room
If you are not the room owner, you can leave a chat room from the
Rooms list or from the chat
room header.
To leave a room from the Rooms list
- Hover on the chat room in Rooms.
- Click Leave Room.
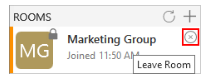
The chat room is removed from the Rooms list. If the chat room was private, you need to be
invited again to rejoin.
To leave a room using the chat room shortcut menu
- Right-click (Windows) or CTRL+click (Mac) on the chat room in Rooms.
- Click Leave Room.
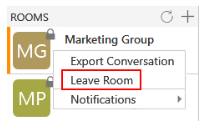
The chat room is removed from the Rooms list. If the chat room was private, you need to be
invited again to rejoin.
To leave a chat room using the room options
- Click on the chat room in Rooms.
- Click More options for this conversation.

- Click Leave Room.

The chat room is removed from the Rooms list. If the chat room was private, you need to be
invited again to rejoin.
Deleting a chat room
If you are a room owner, you can delete both public and private chat rooms. If you delete the
room, it is no longer available for other room members.
To delete a room from the Rooms list
- Hover on the chat room in Rooms.
- Click Delete Room.

The chat room is deleted and removed from the Rooms list.
To delete a room using the chat room shortcut menu
- Right-click (Windows) or CTRL+click (Mac) on the chat room in Rooms.
- Click Delete Room.
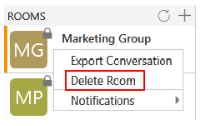
The chat room is deleted and removed from the Rooms list.
To delete a chat room using the room options
- Click on the chat room in Rooms.
- Click More options for this conversation.

- Click Delete Room.

The chat room is deleted and removed from the Rooms list.
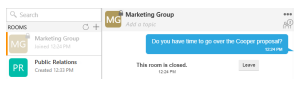
The room owner deletes a chat room
The room owner may delete a chat room that you are a member of. If this happens, the chat room
remains in
Rooms but is dimmed and shows a message that the room is closed.
To remove the chat room from Rooms, leave the room using one of the methods above. In
addition to the above methods, you can leave from the chat room messages panel. If you want to
keep the message history, export the conversation before you leave the room.
To leave a closed chat room
- Click on the chat room in Rooms.
- Click Leave in the messages.
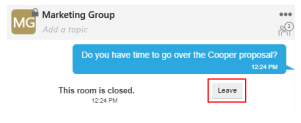
The chat room is deleted and removed from the Rooms list.
Working with messages
SoftPhoneApp allows you to preview hyperlinks, search, copy/paste, export, and delete messages
and conversations.
Previewing hyperlinks
When you send or receive a message with a hyperlink in it, SoftPhoneApp can show a preview
of the hyperlink in the message.
 To control hyperlink previews
- Click Preferences on the Softphone menu (Windows) or the SoftPhoneApp menu
(Mac).
- Select or clear Show hyperlink preview on messages.
SoftPhoneApp either shows or removes previews for all the hyperlinks in Messages.
Search messages
You can use the search feature to find a message in an IM or group chat using a
Room Name,
name or a keyword.
To search in messages
- Type the Room Name, contacts name or search keywords in the Search Messages field.
SoftPhoneApp filters the sessions that contain the search words.

SoftPhoneApp displays the chat room an IMs that contain the search word.
- Click the chat room or instant message you want to view.
SoftPhoneApp displays the messages in the chat room or IM that contain the name or
keyword. SoftPhoneApp displays the entire chat room when Room Name was used as the
search word.
The session appears in the Messages pane.
Copying and pasting messages
You can copy messages from SoftPhoneApp and paste within the SoftPhoneApp or in another
application.
To copy and paste messages
- In the Messages window, highlight the message or messages that you want to copy.
- Windows: Right-click one of the selected messages and click Copy or press CTRL+C on
the keyboard.
Mac: COMMAND+ click on one of the selected messages and click Copy or press
COMMAND+C on the keyboard.

SoftPhoneApp places the messages on the clipboard. You can paste the messages in
SoftPhoneApp or in another app on your computer.
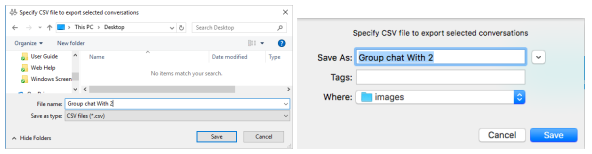
Exporting messages
You can export instant messages and chat room messages into a CSV file.
Tip: When you close or leave a chat room, you no longer have the conversaOon history. If you
want to keep the messages, export them first.
To export a conversation using the More menu
- Click More options for this contact, More options for this conversation (Windows) or
More options for this conversation (Mac), and then click Export Conversation.

SoftPhoneApp opens the File Manager.
- Select the location and enter a name for the file. Click Save.
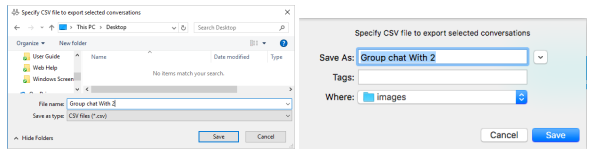
SoftPhoneApp saves the session as a .csv file in the location you selected.
To export a conversation using the shortcut menu
- Right-click on the IM or chat room and click Export Conversation.
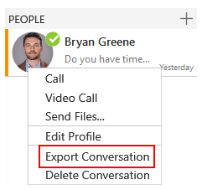
SoftPhoneApp opens the File Manager.
- Select the location and enter a name for the file. Click Save.
SoftPhoneApp saves the session as a .csv file in the location you selected.
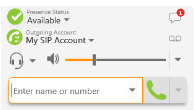
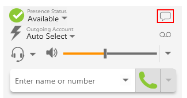
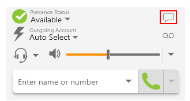
Presence
SoftPhoneApp allows you to share your online status (your presence) with contacts who have a
softphone number. When you launch SoftPhoneApp, your online status is
Available.
You can view the status of contacts who have a softphone number or an XMPP address if they
choose to share their status with you.
Changing your status
SoftPhoneApp allows you to share your online status (your presence) with contacts who have a
softphone number or an XMPP address. When you launch SoftPhoneApp, your online status is
Available.
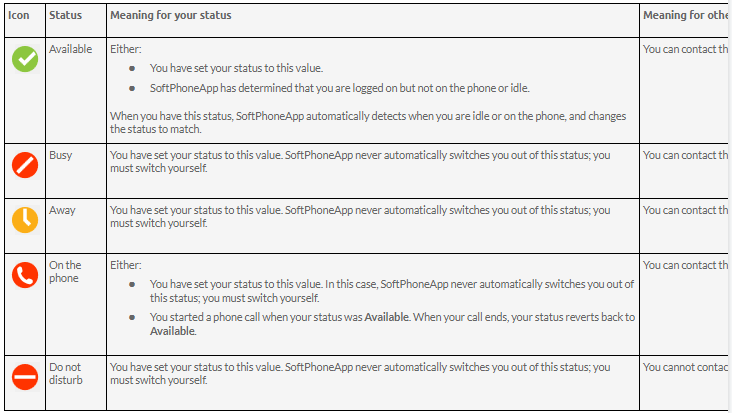
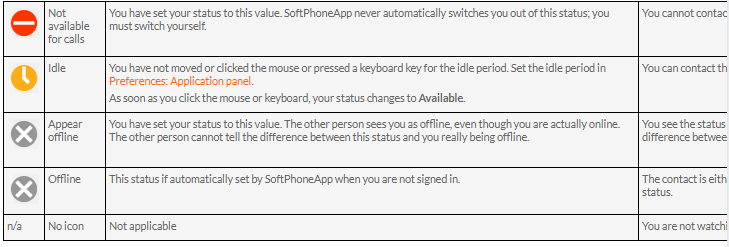
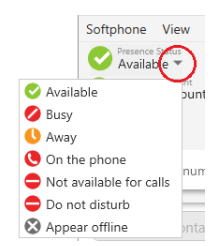
You can change your status from Available to Busy, Away, Not available for call, Do not
disturb, and Appear offline. When you change your status from Available, SoftPhoneApp no
longer automatically updates your status and it remains as what you set it to until you change it
again.
SoftPhoneApp updates your status to On the phone when you make or receive a phone call if
your status is Available. If you do not use your computer for a specified period of time (set in
Preferences: Application panel), SoftPhoneApp updates your status to Idle.
To change your status
- Click the drop-down arrow beside your online status indicator.
- Select the status you want to display.
SoftPhoneApp updates your status. If you change your status away from Available,
SoftPhoneApp does not automatically update your presence.
Status indicators and what they mean
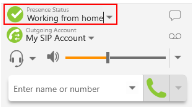
Settings your custom status
You can create a custom wording for your presence status. When you set a custom status,
SoftPhoneApp does not automatically update your status for you.
To change your custom status
- Click on the wording in the status indicator and type your custom status. Press ENTER
when you finished.
SoftPhoneApp returns to the default status wording.
To remove your custom status
- Click on the wording in the status indicator, delete all text, and press ENTER.
SoftPhoneApp returns to the default status wording.
Online status alerts
You can add and remove contacts, Favourites, or group of contacts to the alert list. When a
contact is on the alert list, you receive a SoftPhoneApp notification when their online status has
changed.
To add contacts or Favourites to the alert list
- Click on a contact or favorite, or use SHIFT+Click, CTRL+Click (Windows),
COMMAND+Click (Mac) or a combination to select one or more contacts or Favourites.
- Right-click (Windows) or CTRL+click (Mac) and select Add to Alert List (Windows) or
Add Contact to Alert List (Mac).
An alert icon appears by the contact after you add them to the alert list. The icon disappears
when you remove the contact from the alert list.

To add groups to the alert list
- Click on a group or use SHIFT+Click, CTRL+Click (Windows), COMMAND+Click (Mac)
or a combination to select one or more groups.
- Right-click (Windows) or CTRL+click (Mac) and select Add Group to Alert List
(Windows) or Add Contacts in Group to Alert List (Mac).
SoftPhoneApp adds the contacts in the group to the alert list. An alert icon appears by the
contacts in the group.

To remove contacts or Favourites from the alert list
- Click on a contact or favorite, or use SHIFT+Click, CTRL+Click (Windows),
COMMAND+Click (Mac) or a combination to select one or more contacts or Favourites.
- Right-click (Windows) or CTRL+click (Mac) and select Remove from Alert List
(Windows) or Remove Contact from Alert List (Mac).
SoftPhoneApp removes the contacts or Favourites from the alert list. The alert icon disappears
from the contacts.
To remove groups from the alert list
- Click on a group or use SHIFT+Click, CTRL+Click (Windows), COMMAND+Click (Mac)
or a combination to select one or more groups.
- Right-click (Windows) or CTRL+click (Mac) and select Remove Group from Alert List
(Windows) or Remove Contacts in Group from Alert List (Mac)
SoftPhoneApp removes the groups from the alert list. The alert icon disappears from the
contacts.
Alert styles
Windows
You will receive a notification when the contact changes their status. On Windows 7 alerts,
select Keep contact on Alert List if you want to continue to see presence changes. On Windows
10 toast notifications, click Remove Alert to stop seeing presence changes for the contact. You
can call or IM the contact directly from both alert styles.

Mac
Banner style notifications appear briefly in the top corner of the screen. They will disappear on
their own. Alert styles notifications appear and remain on the screen until you take action on
them. Click the notification to bring SoftPhoneApp into the foreground.

File sharing
Send and receive files with SoftPhoneApp from your XMPP account to a contact that has an
XMPP account. To use XMPP file transfer, both the sender and receiver need to subscribe to
each other's contact presence using XMPP, and the recipient needs to have their XMPP account
enabled.
Sending files
You can send a file:
- Using the shortcut menu
- By dragging a file to an IM session
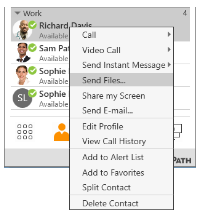
To send a file using the shortcut menu
You can use the shortcut menu to send files from the
Messages window, contacts, and
Favourites.
- Right-click (Windows) or CTRL+Click (Mac) on a contact or favorite and click Send
Files. The file manager opens.
- Find the file you want to send. Double-click the file or click the file and click Open.
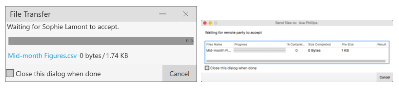
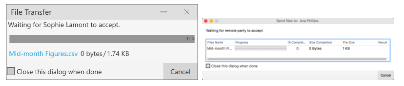
A
File Transfer (Windows) or a
Send files to:
Recipient (Mac) dialog opens. SoftPhoneApp
waits for the recipient to accept the file transfer. If you want to cancel the transfer, click
Cancel
before the recipient accepts.
To send a file by dragging it to an IM session
- Open your file manager and locate the file you want to transfer.
- Drag the file into an IM session on the Messages window.
A
File Transfer (Windows) or a
Send files to:
Recipient (Mac) dialog opens. SoftPhoneApp
waits for the recipient to accept the file transfer. If you want to cancel the transfer, click
Cancel
before the recipient accepts.
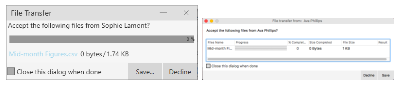
Receiving files
Another SoftPhoneApp user within your organisation can send you
files. The following dialog appears when the other party initiates the transfer. Click
Save and set
the location to save the file.
Contacts
SoftPhoneApp stores your contacts for you. These contacts may be contacts you have added
using SoftPhoneApp, they can be contacts that are synched with your Outlook , or they can be
special SoftPhoneApp contacts known as Buddies - contacts who share their presence with you.
Contacts are organized in groups in List of contacts (Windows) or Contacts (Mac) - referred
to as Contacts. The Contacts tab is empty at start-up. Each contact is shown with presence
information (if available) and icons for single-click calling and messaging.
If you have contacts that you use frequently, you can add these contacts as Favourites for easier
access.
If the Contacts or Favourites tabs are not showing, click Show Contacts or Show Favourites
on the View menu.
Viewing contacts
You can view a contact from the Contacts, Favourites or History tab.
Using Contacts and Favourites
In Contacts or Favourites, you can open the Contact Info flyout, or open the Contact Profile
(Windows) or the Contact Editor (Mac) for more contact details.
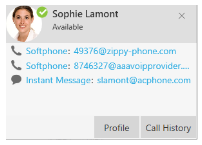
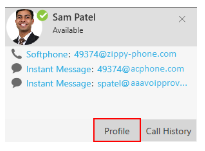
Using the Contact Info flyout
- Click on a contact in Contacts or Favourites. A Contact Info flyout appears with contact
information.
- Click Profile if you want to see more information.
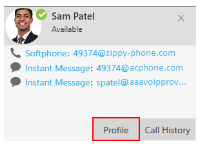
SoftPhoneApp displays the Contact Profile (Windows) or the Contact Editor (Mac).
Using the shortcut menu
- Right-click (Windows) or CTRL+click (Mac) on a contact in Contacts or Favourites and
select Edit Profile (Windows) or View/Edit Profile (Mac).
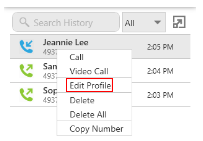
SoftPhoneApp displays the Contact Profile.
Using History
In History, you can open the Contact Info flyout, or open the Contact Profile (Windows) or the
Contact Editor (Mac) for more contact details.
Using the Contact Info flyout
- Click on a History group to expand the group entry.
- Click on Contact Info. A Contact Info flyout appears with contact information.
- Click Profile if you want to see more information.
SoftPhoneApp displays the Contact Profile (Windows) or the Contact Editor (Mac).
Using the shortcut menu
- Right-click (Windows) or CTRL+click (Mac) on a call group or the heading of an
expanded call group.
- Click Edit Contact.
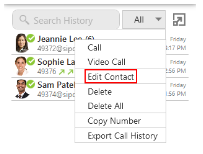
SoftPhoneApp displays the Contact Profile (Windows) or the Contact Editor (Mac).
Adding and exporting contacts
For each contact you communicate with, you can save their information as an entry in the
contacts list. These contacts are added individually or by importing multiple contacts from
another source. You can also export your contacts to a .csv file, a vCard file, or a .pst file.
When you first deploy SoftPhoneApp, and at any time in the future, you may want to populate
the contacts from an external source such as a file of contacts in your Outlook address book.
You can populate the contacts in these ways:
- By entering contact information
- By importing contacts
- From an XMPP account
- From LDAP or Active Directory
- Windows: From your Microsoft Outlook account
Adding an individual contact
You can add contacts individually in the Contacts panel, using the Contacts menu and in the
History panel. For information on populating contacts, see Adding and exporting contacts.
Adding a contact in the Contacts panel
The contact is added to the SoftPhoneApp.
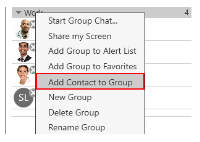
To add a contact using the shortcut menu
- Right-click (Windows) or CTRL+click (Mac) on a group and click Add Contact to
Group. The Contact Profile (Windows) or the Contact Editor (Mac) window opens.
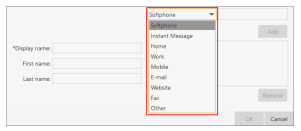
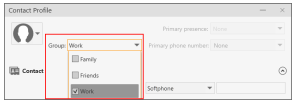
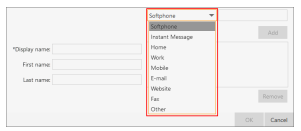
- Use the drop down list to select the type of information you want to add, type the
information, and click Add (Windows) or the Add number icon (Mac).

When you use the Instant Message contact method, a window will open to send an
introduction to the contact. Type an introduction, if desired. If you do not want to see the
presence status for this person, clear Enable presence. When you are finished click
Continue.

- Complete the Display name (required on Windows).
- Complete any other fields you want to include with the contact.
- Click OK.
The contact is added to the SoftPhoneApp.
Adding a contact using the Contacts menu
You can add contacts to SoftPhoneApp using the
Contacts menu on the menu bar.
To add a contact using the Contacts menu
- Click Add Contact on the Contacts menu.
- Use the Group drop-down arrow to select the group or groups that you want a contact to
belong to.
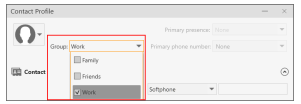
When you use the Instant Message contact method, a window will open to send an
introduction to the contact. Type an introduction, if desired. If you do not want to see the
presence status for this person, clear Enable presence. When you are finished click
Continue.
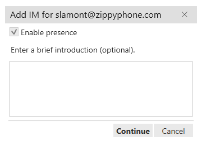
- Complete the Display name (required on Windows).
- Complete any other fields you want to include with the contact.
- Click OK.
The contact is added to the SoftPhoneApp.
Adding a contact in the History panel
The contact is added to the SoftPhoneApp.
To add a contact using the shortcut menu
- Right-click (Windows) or CTRL+click (Mac) on the History entry with the caller ID
Unknown and click Add to Contacts.
The Contact Profile(Windows) or the Contact Editor (Mac) opens.
- Use the Group drop-down arrow to select the group or groups that you want a contact to
belong to.
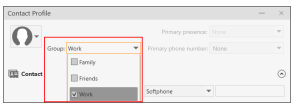
- Use the drop down list to select the type of information you want to add, type the
information, and click Add (Windows) or the Add number icon (Mac).
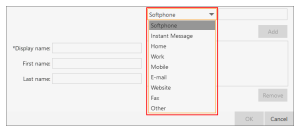
When you use the Instant Message contact method, a window will open to send an
introduction to the contact. Type an introduction, if desired. If you do not want to see the
presence status for this person, clear Enable presence. When you are finished click
Continue.
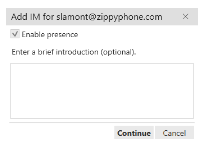
- Complete the Display name(required on Windows) and any other fields you want to
include with the contact.
- Click OK.
The contact is added to the SoftPhoneApp.
Importing contacts
You can populate SoftPhoneApp's contacts by importing an external file or files. Your system
administrator may have placed a file on the server for you to import. You can also import your
own file or files. New contacts will be added to existing contacts.
You can import a contact list from:
- .csv file: A comma-separated value file. Use this method to import from a Microsoft®
Excel® file.
- vCard file (*.vcf file): A vCard is an electronic business card that is often attached to an email.
- .pst file: (Windows) A Microsoft Exchange® contact list (*.pst file).
- Mac Address Book: (Mac) A Mac contact list.
To prepare a CSV file in Excel for import
- Remove any introductory text or headings from the to of the file. You can keep the text at
the end of the file as it will be ignored during import.
- Insert a blank row as the first row. In the next row, insert the heading that SoftPhoneApp
will use to interpret the meaning of each column. The columns can be in any order. The
key heading are:
- sip-address: SoftPhoneApp recognizes a value in this column as a softphone address
and considers the address as one that can be phoned and one that can be using for
IM and presence (if SIP is being used for IM and presence).
- xmpp-address: SoftPhoneApp recognizes a value in this column as a Jabber (XMPP) address and will map this field to the Instant Message field for the contact.
- display-name, given-name, and surname
- business_number
- presence_subscription: Complete this field in one of these ways:
If you only want to share presence information with some of your contacts, fill in
this column in the file. Enter "true" for contacts whose online presence you want to
see. Leave this column blank or enter "false" for others. During the import, you will
be able to choose to share presence with only the contacts that have "true".
SoftPhoneApp will subscribe to the presence for "true" contacts assuming that the
user has a SIP account (if SIP is being used for IM and presence).
If you want to share presence with all or with none of your contacts, ignore this
heading. During the import you will be able to choose whether to share will all or
none of your contacts.
For a complete list of headings, see Contact list headings.
- Save the file as "*.csv".
The file is now ready for import.
To import contacts from a .pst, .csv, or vCard file
- On the Contacts menu, click Import Contacts.
- Select the file type - Comma-separated values (*.csv file), vCard (*.vcf file), or
Outlook or Exchange server (Windows only) - and click Next.
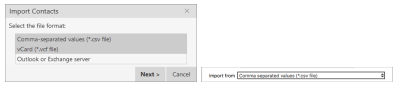
- Enter the location of the file and click Next.

- Set the Contact Options and the Presence options for all imported contacts and click
Next.
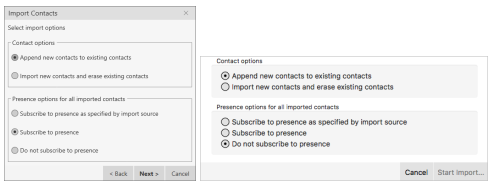
SoftPhoneApp imports the contacts that are in the file.
To import Mac address book contacts
- On the Contacts menu, select Import Contacts.
- Use the drop-down list to select Mac address book in the Import from field and leave
Location blank.

- Set the Contact Options and the Presence options for all imported contacts and click
Start import.
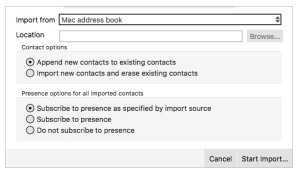
- Select the individual contacts you want to import or select the check box for Select all
contacts.
- Click Import.
SoftPhoneApp imports the contacts that are in the file.
Exporting contacts
You can export SoftPhoneApp contacts to a file on your computer.
Windows
In Windows, SoftPhoneApp contacts can be exported as a .csv file, a vCard file, or a .pst file.
To export a .csv file
- On the Contacts menu, click Export Contacts.
- Select Comma-separated value (*.csv file) from the drop-down list and click Next.
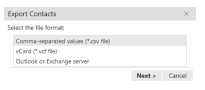
- Click Browse.
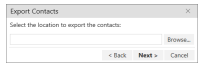
- Use the file explorer to find the location you want to save the file, give the file a name and
click Save.
- Click Next on Export Contacts.
A new .csv file is created in the location you chose in the
Export Contacts wizard.
- PST: For a PST export, the existing PST file is updated to include the entries from
SoftPhoneApp. If Microsoft® Outlook® is open, the entries immediately appear in the
Outlook contacts.
All information in SoftPhoneApp is exported to Microsoft Outlook. Only information that
can be displayed in Outlook appears in the Outlook Contacts window. Typically, this
means that all softphone addresses are exported (and stored in custom fields) but not
displayed in Outlook.
- vCard and CSV: A new file of the specified type is created in the location you chose in
the Export Contacts wizard.
To export a .vCard file
- On the Contacts menu, click Export Contacts.
- Select vCard (*.vcf file) from the drop-down list and click Next.
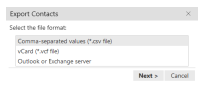
- Click Browse. The Browse For Folder dialog opens.
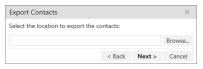
- Use Browse For Folder to navigate to the location you want to save the file and click OK.
- Click Next on Export Contacts.
A new vCard file is created in the location you chose in the Export Contacts wizard.
To export a .pst file
- On the Contacts menu, click Export Contacts.
- Select Outlook or Exchange server from the drop-down list and click Next.
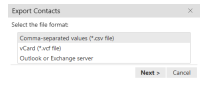
- Click Browse.
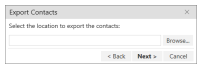
The Windows save dialog open.
- Use the file explorer to find the location you want to save the file, give the file a name and
click Save.
- Use the drop down list to select a field to use in the .pst file for the softphone address and
the IM address.
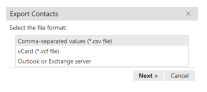
- Click Next.
The existing PST file is updated to include the entries from SoftPhoneApp. If Microsoft®
Outlook® is open, the entries immediately appear in the Outlook contacts. Typically, this means
that all softphone addresses are exported (and stored in custom fields) but not displayed in
Outlook.
Mac
In Mac, SoftPhoneApp contacts can be exported as a .csv file or a vCard file.
To export a .csv file
- On the Contacts menu, click Export Contacts.
- Select Comma separated values (*.csv file) from the drop-down list.
- Type a name for the file in Save as.
- Use Browse to select the location you want to export the file to.
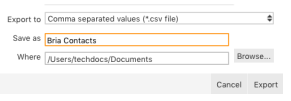
- Click Export.
A new file of the specified type is created in the location you chose in the Export Contacts
wizard.
To export a vCard file
- On the Contacts menu, click Export Contacts.
- Select vCard (*.vcf file) from the drop-down list.
- Use Browse to select the location you want to export the file to.
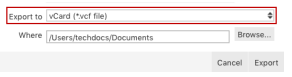
- Click Export.
A new file of the specified type is created in the location you chose in the Export Contacts
wizard.
Editing a contact
You can update contact information, merge and split contacts, change the contact groups, and
delete contacts.
Updating contact information
You can open the Contact Profile (Windows) or the Contact Editor (Mac) from Contacts,
Favourites, or History. Once in the Contact Profile (Windows) or the Contact Editor (Mac),
you can edit the contact.
Using Contacts and Favourites
In Contacts and Favourites, you can use the Contact Info flyout or the shortcut menu to open
the Contact Profile (Windows) or the Contact Editor (Mac) so you can edit contacts.
To edit a contact using the Contact Info flyout
- Click on a contact and click Profile in the Contact Info flyout.
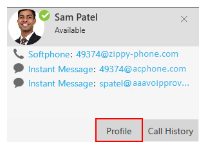
The Contact Profile (Windows) or the Contact Editor (Mac) window opens.
- Edit any of the fields that need to be changed.
- Click OK.
The contact is updated in SoftPhoneApp. If you add or edit the
Softphone or
Instant Message
contact method, an online status request is sent to this person.
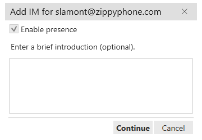
To edit a contact using the shortcut menu
- Right-click (Windows) or CTRL+click (Mac) on a contact and select Edit Profile
(Windows) or View/Edit Profile (Mac).
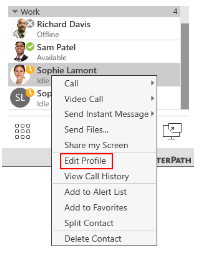
The Contact Profile (Windows) or the Contact Editor (Mac) window opens.
- Edit any of the fields that need to be changed.
- Click OK.
The contact is updated in SoftPhoneApp. If you add or edit the
Softphone or
Instant Message
contact method, an online status request is sent to this person.

Using History
In History, you can use the Contact Info flyout or the shortcut menu to open the Contact
Profile (Windows) or the Contact Editor (Mac) so you can edit contacts.
To edit a contact using the Contact Info flyout
- Click on a History group to expand the group entry.
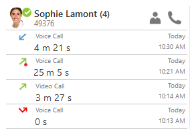
- Click on Contact Info. A Contact Info flyout appears with contact information.
- Click Profile.
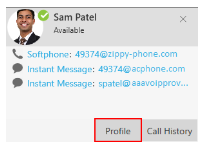
The Contact Profile (Windows) or the Contact Editor (Mac) window opens.
- Edit any of the fields that need to be changed.
- Click OK.
The contact is updated in SoftPhoneApp. If you add or edit the
Softphone or
Instant Message
contact method, an online status request is sent to this person.
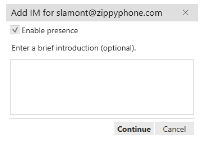
To edit a contact using the shortcut menu
- Right-click (Windows) or CTRL+click (Mac) on a call group or the heading of an
expanded call group.
- Click Edit Contact.
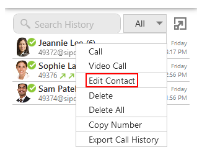
The Contact Profile (Windows) or the Contact Editor (Mac) window opens.
- Edit any of the fields that need to be changed.
- Click OK.
The contact is updated in SoftPhoneApp. If you add or edit the
Softphone or
Instant Message
contact method, an online status request is sent to this person.
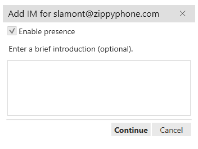
Merging contacts
If you have two entries that should be one contact, you can merge the contacts together.
To merge contacts using the shortcut menu
- Use SHIFT+Click, CTRL+Click (Windows), COMMAND+Click (Mac) or a combination
to select one or more contacts you want to merge.
- Right-click (Windows) or SHIFT+CTRL+Click (Mac) and select Merge Contacts.
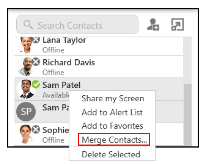
The Contact Profile (Windows) or the Contact Editor (Mac) window opens.
- Edit any of the fields that need to be changed.
- Click OK.
The contacts are merged into a single contact. If you add or edit the Softphone or Instant
Message contact method, an online status request is sent to this person.
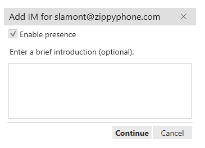
To merge contacts using drag and drop
- Use SHIFT+Click, CTRL+Click (Windows), COMMAND+Click (Mac) or a combination
to select all but one of the contacts you want to merge.
- Drag the selected contacts onto the last contact you want to merge. The Merge Contacts
dialog opens.
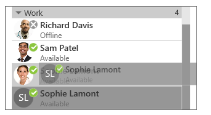
The Merge Contacts dialog opens.
- Click Yes on the Merge Contacts pop-up.
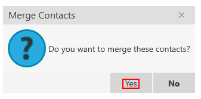
The Contact Profile (Windows) or the Contact Editor (Mac)window opens.
- Edit any of the fields that need to be changed.
- Click OK.
The contacts are merged into a single contact. If you add or edit the Softphone or Instant Message contact method, an online status request is sent to this person.
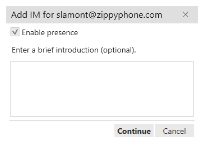
Splitting contacts
If you want to separate a merged contact back into separate contacts, you can split the contact.
To split contacts using the shortcut menu
- Right-click (Windows) or CTRL+click (Mac) on a contact and click Split Contact.
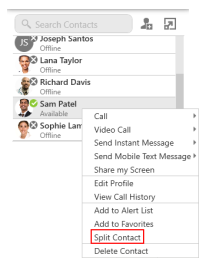
SoftPhoneApp splits that contact into the original contacts.
To split a contact using the Contact Profile
- Right-click (Windows) or CTRL+click (Mac) on a contact and select Edit Profile
(Windows) or View/Edit Profile (Mac).
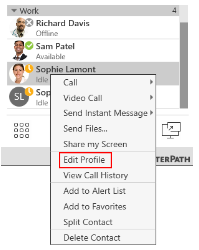
The Contact Profile (Windows) or the Contact Editor (Mac) opens.
- Click Split Contact.
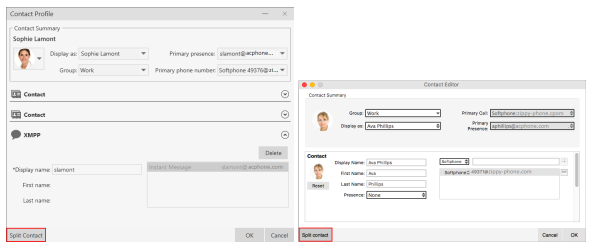
The contact is splits into the original contacts.
Changing contact groups
You can move a contact from one group to another or add them to multiple groups.
To move contacts to another group
- In the contacts panel, use SHIFT+Click, CTRL+Click (Windows), COMMAND+Click
(Mac) or a combination to select one or more contacts you want to move to another group.
- Drag the selected contacts to the title bar of the new group.
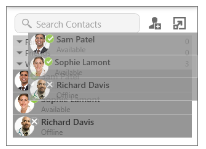
The contact or contacts are removed from the old group and added to the new group.
To add and remove contacts from multiple groups using the Contact Profile
- Right-click (Windows) or CTRL+click (Mac) on a contact and select Edit Profile
(Windows) or View/Edit Profile (Mac).
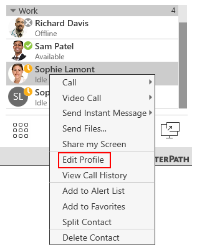
The Contact Profile (Windows) or the Contact Editor (Mac) window opens.
- Click the drop-down arrow in Group. Select the groups you want to add the contact to and
deselect the groups you want to remove the contact from.
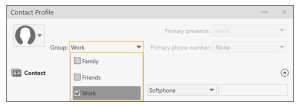
- Click OK.
The contact is added to all groups you selected and removed from all groups you deselected.
To remove a contact from a single group
If a contact is in multiple groups, you can remove them from one of the groups.
- Use SHIFT+Click, CTRL+Click (Windows), COMMAND+Click (Mac) or a combination to
select one or more contacts you want to remove from a group. Make sure you select the
contact or contacts in the group you want to delete them from.
- Right-click (Windows) or CTRL+click (Mac) and click Delete Contact for an individual
contact or Delete Selected for multiple contacts.
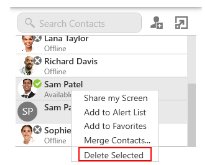
- If the contact belongs to more than one group, clear Delete this contact from all groups
or Delete these contacts from all groups. Click Yes in the Delete Contact dialog.
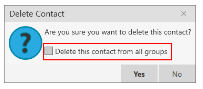
The contact or contacts are removed from the group. They remain in any other groups they
belonged to.
Deleting a contact
You can delete a single contact or a group of contacts from SoftPhoneApp.
To delete one or more contacts
- In the contact panel, use SHIFT+Click, CTRL+Click (Windows), COMMAND+Click (Mac),
or any combination to select the contacts you want to delete.
- Right-click (Windows) or CTRL+click (Mac) and select Delete Contact or Delete
Selected.

- If the contact belongs to more than one group, leave Delete this contact from all groups
or Delete these contacts from all groups selected. Click Yes.
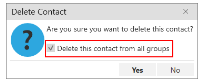
The contacts are deleted.
Managing groups
Contacts are arranged in groups. SoftPhoneApp has three default groups: Family, Friends, and
Work.
Each contact must belong to at least one group and can belong to multiple groups. You can
create, rename, and delete groups.
As well as organizing your contacts, you can perform the following actions on groups instead of
on individual contacts:
- Create a chat room
- Add a group to the alert list
- Add a group to Favourites
Creating a group
Use the shortcut menu or the Contacts menu to create a new group.
To create a new group using the shortcut menu
- Right-click (Windows) or CTRL+click (Mac) on a group in contacts from the shortcut
menu.
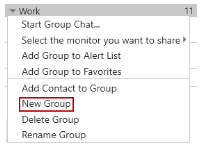
- Type in a group name in the New Group window and click OK.
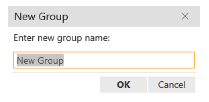
The new
Group is displayed in the
List of contacts.
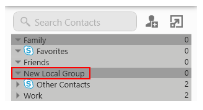
To create a new group using the Contacts menu
- Click New Group on the Contacts menu.
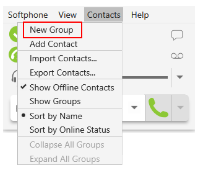
- Type in a group name in the New Group window and click OK.
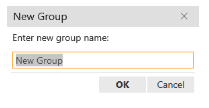
The new Group is displayed in Contacts.
Renaming a group
To rename a group using the shortcut menu
- Right-click on a group in Contacts and select Rename Group.
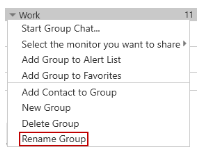
- Type in a the new group name in the Rename Group window and click OK.
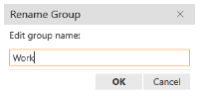
The Group appears with the new name in the List of contacts.
Deleting groups
To delete a group
- Right-click (Windows) or CTRL+click (Mac) on a group in contacts and select Delete
Group.
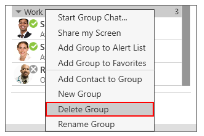
- If there are contacts in the group, click Yes in Delete Group.
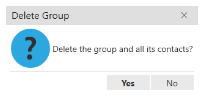
The Group is deleted from contacts. Any contacts that were not in another group are deleted.
Favourites
You can create Favourites from the Contacts panel or in the contact profile. When you add a
contact to Favourites, it displays in both the Contacts panel and the Favourites panel. Adding
contacts to Favourites makes it easier to find contacts that you use frequently.
Adding a contact to Favourites
You can add a contact to
Favourites using the shortcut menu.
To add a contact to Favourites
- Click on a contact or SHIFT+Click, CTRL+Click (Windows), COMMAND+Click (Mac) on
one or more contacts you want to add to Favourites.
- Right-click (Windows) or CTRL+click (Mac) and select Add to Favourites.

The contact or contacts are added to Favourites.
Adding a group to Favourites
You can add a group to
Favourites using the shortcut menu.
To add a group to Favourites
- Click on a contact, SHIFT+Click, CTRL+Click (Windows), COMMAND+Click (Mac) one
or more contacts you want to add to Favourites.
- Right-click (Windows) or CTRL+click (Mac) and select Add Group to Favourites
(Windows) or Add Contacts in Group to Favourites (Mac).
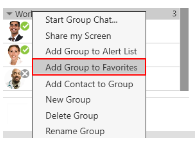
The contacts in the group or groups appears are added to Favourites and can be viewed in the
Favourites panel.
Removing a contact from Favourites
You can remove a contact from
Favourites panel using the shortcut menu.
To remove a contact from Favourites
- On the Favourites panel, click on a contact, or SHIFT+Click, CTRL+Click (Windows),
COMMAND+Click (Mac) one or more contacts you want to remove from Favourites.
- Right-click (Windows) or CTRL+click (Mac) and select Remove from Favourites.
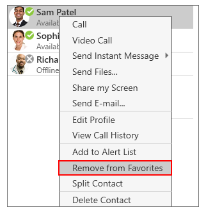
The contact or contacts are removed from the Favourites panel but still appear in the Contacts
panel.
Warning: If you select Delete Contact, the contact is deleted from SoRPhoneApp, not just from
Favourites.
History
All SoftPhoneApp calls are captured in the SoftPhoneApp's List of recent calls (Windows) or
History (Mac) - referred to as History. The last 200 records are stored in SoftPhoneApp and
grouped by phone number.
Recordings are stored in History and can be played back or deleted right from SoftPhoneApp.
Viewing History
All SoftPhoneApp calls are captured in SoftPhoneApp's List of recent calls (Windows) or
History (Mac) - referred to as History. Calls are grouped to easily find all calls from one
contact, and can be filtered to make it easier to find a specific call. Recordings are captured in
history - listen to, share, or delete recordings directly from history.
Call grouping
Calls captured in SoftPhoneApp's history are grouped by name and caller ID. The caller ID can
be a phone number or a SIP address, but will be referred to as phone number. The group can be
expanded and collapsed to show or hide the individual calls in the group.
If a person has called you from multiple numbers, you may see more than one group of calls for
them.
Collapsed group display
The collapsed group displays an overview of call information: the name and presence status of
the caller, the number and types of calls, and the time and date of the most recent call.

Expanded group display
The expanded group shows a list of recent calls between you and the person. The most recent
calls are displayed at the top of the list. In addition to the information displayed in the collapsed
group, SoftPhoneApp also shows whether the call was voice or video, the time and date, and the
length of the call.
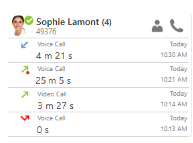
Multiple groups for the same number
In some cases, calls from the same person may show up in multiple groups. If one call only
contains the phone number, and another call contains the phone number with a domain, they
calls appear in two different groups. SoftPhoneApp does not strip the domain and try to match
the results with other calls.

Multiple contacts with the same number
When you have a number that is used for multiple contacts, all calls for that number are
grouped together as
Multiple Contacts. Expand the group and click
Contact Info to see the
contacts associated with the number.

Unknown contacts
There are two types of unknown contacts that can appear in the call history. If a call comes from a phone number that is not in your contacts, the contact is grouped as
Unknown with the phone number displayed. Calls that come in with an unknown number are grouped as
Unknown with
Unknown displayed for the number.
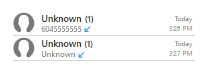
To view all calls in a group
- Click the group you want to expand.
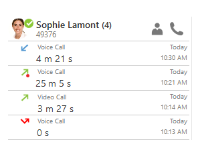
SoftPhoneApp displays the expanded group.
Call type icons and their meanings
Incoming call
Outgoing call
Incoming call with a call recording
Outgoing call with a call recording
Missed call
Filtering call history
Limit the calls you see in the call history using filtering. SoftPhoneApp lets you filter all calls,
missed calls, calls with recordings, and calls by date.
Filtering for missed calls
You can filter call history for all missed calls or filter for missed calls on a specific account if
you have more than one account.
To filter missed calls
- Click on the call filter and click Missed Calls.
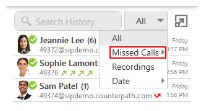
- Click All or click the account you want to see missed calls from if you have more than one
SIP account.
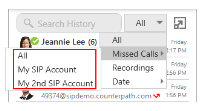
SoftPhoneApp displays all missed calls or the missed calls for the selected account.

You can filter which calls you see in SoftPhoneApp's
History.
Filtering for recordings
If you are searching for a call recording, you can filter the call history to show only calls that
have recordings.
To filter for recordings
- Click on the call filter and click Recordings.
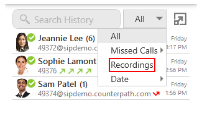
SoftPhoneApp displays all calls that have a recording associated with them.

Filtering by date
You can search SoftPhoneApp for calls based on when the call occurred. Filter calls from Today,
Yesterday, This Week, This Month, Last 7 Days, and Last 30 Days. This Week filters for
calls for the current week running from Sunday to Saturday. This Month filters for calls during
the current calendar month.
To filter by date
- Click on the call filter and click Date.
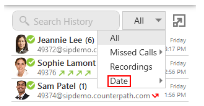
- Click the selector for the dates you want to filter.
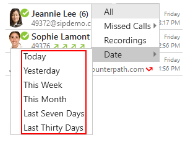
SoftPhoneApp displays all calls that match the date selector.

{size 1rem}{b}Tip: {/b}{/size}To see which filter is applied to call history when the full name
of the filter does not fit, hover over the filter drop down and the full text appears.

Searching and filtering History
To find a specific entry in History, you can filter or search the list of recent calls, or use both
methods.
Limit the calls you see in the call history using filtering. SoftPhoneApp lets you filter all calls,
missed calls, calls with recordings, and calls by date.
Searching History
Search for a call in History by either the name of the caller or by their phone number.
To search History
- Type the name or phone number for the call your are looking for in Search History.
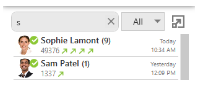
- Expand the History entry to find specific call details.
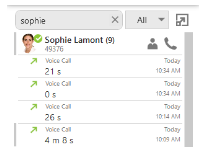
SoftPhoneApp displays all calls from the name or number.
Filtering History
Limit the calls you see in History using filtering. SoftPhoneApp lets you filter all calls, missed
calls, calls with recordings, and calls by date.
Filtering for missed calls
You can filter History for all missed calls or filter for missed calls on a specific account if you
have more than one account.
To filter missed calls
- Click on the call filter and click Missed Calls.
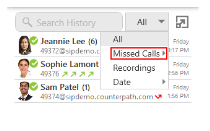
- Click All or click the account you want to see missed calls from if you have more than one
SIP account.
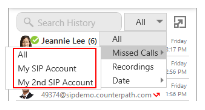
SoftPhoneApp displays all missed calls or the missed calls for the selected account.

Filtering for recordings
If you are searching for a call recording, you can filter the History to show only calls that have
recordings.
To filter for recordings
- Click on the call filter and click Recordings.
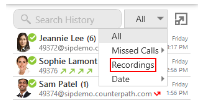
SoftPhoneApp displays all calls that have a recording associated with them.

Filtering by date
You can search SoftPhoneApp for calls based on when the call occurred. Filter calls from Today,
Yesterday, This Week, This Month, Last 7 Days, and Last 30 Days. This Week filters for
calls for the current week running from Sunday to Saturday. This Month filters for calls during
the current calendar month.
To filter by date
- Click on the call filter and click Date.

- Click the selector for the dates you want to filter.
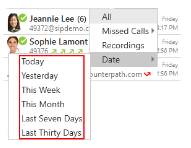
SoftPhoneApp displays all calls that match the date selector.
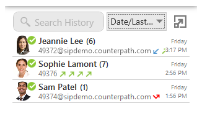
{size 1rem}{b}Tip: {/b}{/size}To see which filter is applied to call history when the full name
of the filter does not fit, hover over the filter drop down and the full text appears

Search and filter History
Use search and filter at the same time. You can filter your results first, and then enter your search
information or enter your search information first and filter your results.
Call recordings in History
Call recording are available in SoftPhoneApp's List of recent calls (Windows) or History (Mac) – referred to as History. You can play and delete recordings from History, in addition to using the file explorer on your computer to play and delete recording files.
Filtering for recordings
If you are searching for a call recording, you can filter History to show only calls that have
recordings.
To filter for recordings
- Click on the call filter and click Recordings.
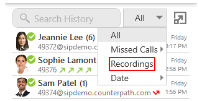
SoftPhoneApp displays all the group that have a recordings associated with them.

Multiple recordings
If you created multiple recordings of a call - you stopped and restarted a recording during the
same call – all the call recording are visible in the expanded view of the call entry.
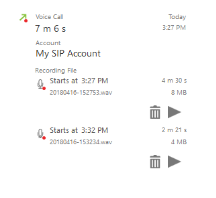
Playing back a call recording
You can play back a call recording using either History or using the file explorer on your
computer. This section describes how to play back a call recording using call history. For more
information on call recording, including using the file explorer to listen to a recording, see
Recording a call.
To play back a call recording
- Optional: Click on the filter and select Recordings.
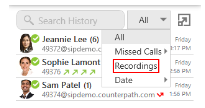
- Click on the history group that contains the recording. The history group expands.
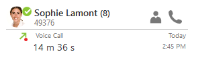
- Click on the call entry that contains the recording. The call entry expands.
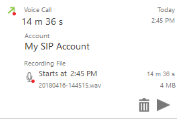
- Click Play Recording.
SoftPhoneApp plays the recording in your default audio player.
Deleting a call recording
You can delete a call recording using History or by locating the file on your computer and
deleting it using file explorer. This section describes how to delete a call in History.
To delete a recording
- Optional: Click on the filter and select Recordings.
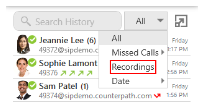
- Click on the history group that contains the recording. The history group expands.
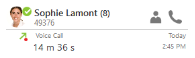
- Click on the call entry that contains the recording. The call entry expands.
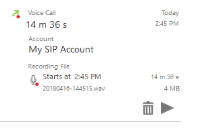
- Click Delete Recording.
- Click OK on Recording File.
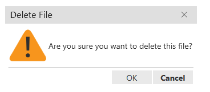
SoftPhoneApp deletes the recording from your computer and you can no longer play back the
file in call history.
The history entry still appears when the Recordings filter is applied. Delete Recording and
Play Recording are still visible in the call entry but are inactive.
Click Recording Info to see when the file was deleted.
Exporting calls from History
You can export your from SoftPhoneApp's List of recent calls (Windows) or History (Mac) -
referred to as History - SoftPhoneApp to a .csv file.
To export call history
- Right-click (Windows) or CTRL+click (Mac) on any group in History and click Export to File.
- Use Browse For Folder to set the location where you want to save the file and click OK.
SoftPhoneApp exports the .csv file to the specified location.
Deleting History
Calls are grouped by caller ID in SoftPhoneApp's List of recent calls (Windows) or History
(Mac) – referred to as History. You can delete all calls in History, or you can delete all calls in a
group.
To delete all calls
- Right-click (Windows) or CTRL+click (Mac) on a call group or the heading of an
expanded call group.
- Click Delete All.
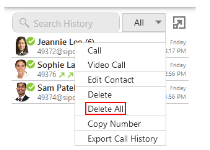
- Click OK on Confirm Delete.
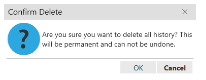
SoftPhoneApp deletes all calls from History.
To delete a History group
- Right-click (Windows) or CTRL+click (Mac) on the call group or the heading of the
expanded call group you want to delete.
- Click Delete.

SoftPhoneApp deletes the calls in the History group.
Warning: There is no warning before all calls in a group are deleted.
Microsoft Office Integration - Windows only
SoftPhoneApp is integrated with Microsoft Office 2013 and Microsoft Office 2016. Microsoft
Office 365 is not supported.
You can place an audio or a video call, send an IM, and see presence information directly from
Outlook's mini-contact card. The mini-contact card appears anywhere you see a contact - the
email header, the Social Connector, the scheduler assistant, the people tab - when you hover
over that contact.
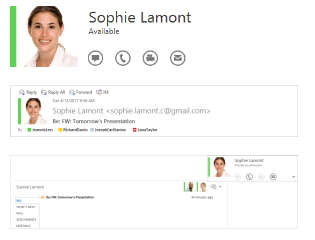
To enable Office integration - Windows only
- Open Preferences on the Softphone menu.
- Click Enable Outlook integration in the Application panel.
- Restart Microsoft Outlook.
SoftPhoneApp is available from Outlook.
To disable Office integration - Windows only
- Open Preferences on the Softphone menu.
- Click Disable Outlook integration in the Application panel.
- Restart Microsoft Outlook.
SoftPhoneApp is no longer available from Outlook.
Placing an audio or video call from Outlook
You can place an audio or video call from the mini-contact card to an Outlook contact that you
have a phone number or softphone number for.
To place a call
- Hover over a person's name anywhere in Outlook. The mini-contact card appears.
- Click on Call or Start video call.

SoftPhoneApp places the call or video call and opens the call panel. If you clicked Start video call, SoftPhoneApp opens the Video window if the remote party answers the call with video.
If a contact has more than one number, you can choose the number you want to call.
To place a call to a contact with multiple numbers
- Click the drop-down arrow beside Call or Start video call and select the number that you want to call.

SoftPhoneApp places the call or video call and opens the call panel. If you clicked Start video call, SoftPhoneApp opens the Video window if the remote party answers the call with video.
IM and presence in Outlook
The Outlook Integration offers you the ability to view presence information and send IMs
directly from Microsoft Office.
Sending an IM
There are two ways to send an IM from Outlook: clicking on IM in the message header and
clicking on Send an IM on the mini-contact card.
To send an IM from the message header
- Click on Send an IM to send an IM to the email sender.

SoftPhoneApp opens the Message window.
- Type your message and click send.
SoftPhoneApp sends the IM.
To send an IM from the mini-contact card
- In the header or in the Social Connector, hover over a name or avatar. The mini-contact
card appears.
- Click Send an IM.

- If the contact has more than one address you can send an IM to, you can choose the
address you want to use. Click the drop-down arrow beside Send an IM.
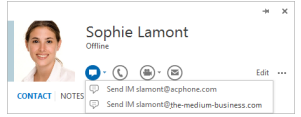
SoftPhoneApp opens the Message window.
- Type your message and click send.
SoftPhoneApp sends the IM.
To view the online presence of contacts
You can view the online status - the presence - of contacts that have share presence information with you in SoftPhoneApp. Presence is shown in the mini-contact card, beside avatars, and beside names in the email header.
Appearance and Meaning of Presence in Microsoft Office
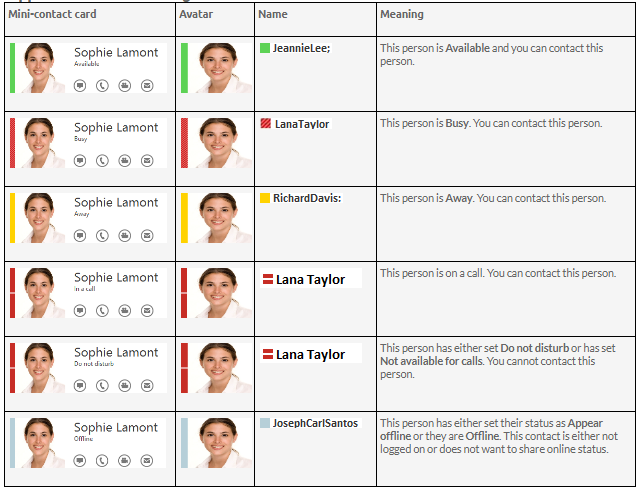
Windows Outlook account settings
You can integrate Outlook contacts with SoftPhoneApp. SoftPhoneApp offers two ways:
- Using an Outlook account (see below)
- Importing a .pst file
If you integrate Outlook contacts using an Outlook account, the contacts are continually synced
with the contacts in Outlook.
This section describes how to integrate Outlook contacts so they remain in sync.
Outlook account
The user can enable the Outlook account to provide SoftPhoneApp with access to the contacts in their address book. The users can map contact addresses to fields in SoftPhoneApp in order to make calls and send messages to Outlook contacts. Calls and messages can be made either from SoftPhoneApp or from within Outlook.
Settings in the panel
Account
- Protocol: Read only. Always specifies Outlook.
Settings in the panel
Account Details
- Outlook profile:The default Outlook profile detected by SoftPhoneApp. If Outlook is set up with more than one profile and you want to use a different profile other than the default, you need to change the default profile in Outlook. After you configure the default profile in Outlook, SoftPhoneApp detects the profile that you have change to.
- Field to use for Softphone address:If you are using SIP for presence, you can set up SoftPhoneApp to treat one of the contact fields in Outlook as a SIP address that can be subscribed to.
{size 1rem}{b}Example: {/b}{/size}Softphone address example
If you select Business Telephone Number in this field, any values that are in the Business Telephone Number field in Outlook are copied to the Softphone field in SoftPhoneApp and SoftPhoneApp subscribes to the online status of that contact through your SIP account. If an Outlook contact has “2766” in Outlook's Business Telephone Number field and your SIP account domain is “domainA.com”, SoftPhoneApp subscribes to “[email protected]”.
- Field to use for IM address: If you have an XMPP account, you can set up SoftPhoneApp to treat one of the contact fields in Outlooks as an XMPP address that can be subscribed to.
{size 1rem}{b}Example: {/b}{/size}IM address example
If you select IM Address in this field, any values that are in the IM Address field in Outlook are copied to the Instant Message field in SoftPhoneApp and SoftPhoneApp subscribes to the online status of that contact through your XMPP account. If an Outlook contact has “[email protected]” in Outlook's IM Address and the domain of your XMPP account is acphone.com, SoftPhoneApp subscribes to “[email protected]”.
Mac Address Book account
SoftPhoneApp creates the Mac Address Book account automatically. To use the Mac Address
Book account, make sure Enabled is selected in the Account Settings window. Once your Mac
Address Book account in enabled, SoftPhoneApp automatically pulls the Mac Address Book
account contacts into SoftPhoneApp's contacts. You can phone or IM them directly from
SoftPhoneApp.
To set up for presence
If your Mac Address Book contains phone numbers that you know can be used to obtain online
activity information about the person through your SIP account, you can perform this additional
step.
- In the Mac Address book make sure that the contact type is Phone and the label is
softphone (in lower case).
- Enable your Mac Address Book account in SoftPhoneApp > Preferences > Account
Settings. SoftPhoneApp pulls in the contact with the specified number already set up as a
softphone address.
- Open the contact in SoftPhoneApp and choose the specified phone number in the Primary
Presence field and click OK.
SoftPhoneApp obtains the presence for this contact.
Configuring SoftPhoneApp - Preferences
There are two ways of configuring SoftPhoneApp - Account Settings and Preferences.
Account Settings are settings that only apply to an individual account.
Preferences are settings that let you control the way that you work in SoftPhoneApp.
Preferences also contains fields to configure features that apply globally rather than on a per-account basis.
This section describes Preferences.
For Windows, click Preferences on the Softphone menu. For Mac, click Preferences from the SoftPhoneApp menu on the menu bar.
Preferences: Application panel
This panel lets you set preferences for the general user interface.
Login options
Login is typically only used in enterprises and requires a login/provisioning server.
To choose your login options
If you chose
I will manually input my account configuration when you started SoftPhoneApp but you actually do have a login credentials, you can select
Enable Sign In screen here.
- On the Application panel of the Preferences window, select Enable Sign In screen.
- Exit SoftPhoneApp by clicking Exit on the Softphone menu (Windows) or by clicking Quit SoftPhoneApp on the SoftPhoneApp menu on the menu bar (Mac).
- Launch SoftPhoneApp.
The login screen appears. Select the correct option and log in.
Settings in the panel:
General Preferences (Windows)
Language: The language you want the app to run in. Restart SoftPhoneApp for the change to take effect. Supported languages are English (US), Dutch, French, German, Italian, Japanese, Portuguese, Russian, Simplified Chinese, and Spanish.
Launch when Windows starts:Determines whether you need to start SoftPhoneApp manually.
- Selected: SoftPhoneApp SoftPhoneApp launches when you start Windows.
- Cleared: Start SoftPhoneApp manually.
Call immediately once a phone number is selected: Restart SoftPhoneApp for the change to take effect.
- Selected: You can start a SoftPhoneApp call without click the Make a call button.
- Cleared: You must click the Make a call button to start a call.
Enable Sign In screen: Only available when you selected I will manually input my account configuration on initial start up. Check if you have login credentials. Restart SoftPhoneApp for the change to take effect.
- Selected: The next time you start SoftPhoneApp, you will see the sign in screen.
- Cleared:The next time you start SoftPhoneApp, you will not see the sign in screen.
Set SoftPhoneApp as your default softphone: This works for Windows 7 only. See Setting SoftPhoneApp as your default softphone to set SoftPhoneApp as your default softphone in Windows 10.
Enable/Disable Outlook integration: See Office integration.
General Preferences (Mac)
Pause iTunes when making or receiving calls:
- Selected: SoftPhoneApp pauses iTunes when you are using SoftPhoneApp to place and receive calls.
- Cleared: SoftPhoneApp does not pause iTunes when you are using SoftPhoneApp to place and receive calls.
Set SoftPhoneApp as your default softphone: Determines whether SoftPhoneApp is your default softphone.
- Selected: SoftPhoneApp is your default softphone.
- Cleared: SoftPhoneApp is not your default softphone.
Call immediately once a phone number is selected: Restart SoftPhoneApp for the change to take effect.
- Selected: You can start a SoftPhoneApp call without click the Make a call button.
- Cleared: You must click the Make a call button to start a call.
Enable Sign In screen: Only available when you selected I will manually input my account configuration on initial start up. Check if you have login credentials. Restart SoftPhoneApp for the change to take effect.
- Selected: The next time you start SoftPhoneApp, you will see the sign in screen.
- Cleared: The next time you start SoftPhoneApp, you will not see the sign in screen.
Messages & Presence
Display idle status if I don't use my computer for:
- Selected: SoftPhoneApp automatically changes your status to Idle if you have not used your computer for a set amount of time.
- Set the amount of time here. Time is measured in minutes.
In messaging, pressing Enter will: Set the action for pressing ENTER when you are composing an IM.
- Send the message (Use SHIFT + ENTER to create a line) (Windows)
- Create a new line (Use SHIFT+ ENTER to send) (Windows)
- Send the message (Use CTRL+ ENTER to create a new line (Mac)
- Create a new line (Use CTRL+ ENTER to send) (Mac)
Show timestamp on messages:Changing this setting affects all messages in your history.
- Selected: SoftPhoneApp displays date and time information in the message.
- Cleared: SoftPhoneApp only displays the message content.
You can always hover over a message to get the date and time information.
Show hyperlink preview on messages: SoftPhoneApp can display a preview for any hyperlinks that appear in Messages.
- Selected: SoftPhoneApp shows a hyperlink preview in the message.
- Cleared: SoftPhoneApp does not show a hyperlink preview in the message.
Messaging Font Face: Use the drop-down box to select a different font for your messages.
Messaging Font Size:Use the drop-down box to select a font size for your messages.
Default Actions
This section lets you configure the default action for the Call and Transfer buttons and the action that occurs for double-clicking on a contact.
- You can set the action of the Call button to Call, Make a video call, or Start a conference.
- You can set the action of the Transfer button to Call First for attended transfers or Transfer Now for unattended transfer. You can use the drop-down to change the action of the button on an individual call basis. See Transferring a call.
- You can set the action for double-clicking to Call, IM, or E-mail.
Button: Use the drop-down list to select the button you want to change the default action for.
Default Action: Use the drop-down list to set the action that occurs when you single-click on the Call or Transfer button.
Call button
- Call
- Make a video call
- Start a conference
- Call First
- Transfer Now
Action when double-clicking on contact: Use the drop-down list to set the action that occurs when you double-click on a contact.
Security
This section lets you decide what happens when another application requests SoftPhoneApp API access.
When an application requests SoftPhoneApp API access: Select one of the options to determine how API requests are handled.
- Prompt to all access each time
- Allow access always
- Deny access always
Preferences: Alerts and sounds panel
This panel lets you change the way you are notified of calls, IMs, and messages.
For information on the device that SoftPhoneApp uses for ringing, incoming audio, and incoming video, see Preferences: Devices panel.
Enabling alerts
You can set up SoftPhoneApp to send an alert in the following events:
- For an incoming call
- When a contact comes online
- When a contact goes offline
- For IMs
- For new mentions in a chat room
Select Enable alert displays to enable alerts for all the actions. Once Enable alert displays is selected, you can select which events you want to receive an alert for.
For Windows 10, see Configuring OS notifications to make sure system notifications are enabled.
Windows
In Windows, you will receive an notification from SoftPhoneApp. If you are running Windows 10, you may receive a Windows 10 interactive toast notification or a Windows 7 style notification. The Windows 10 interactive toast notification is sent when you select Use Windows notifications in Preferences > Alerts & Sounds.
Windows 7 style notification
A SoftPhoneApp alert allows you to answer a call, answer a call with video (if the remote party initiated a video call), or decline a call.

Windows 10 interactive toast notifications
With an interactive toast notification, you can answer or decline the call, or you can decline the call and send an IM to the remote party. The incoming call notification displays the name of the remote party and the number they are calling from. If you have more than one SIP account, the notification also displays the account that the call is received on.
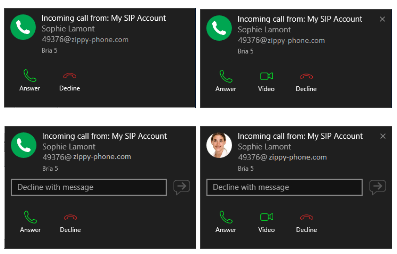
Mac
SoftPhoneApp uses OS notifications. Make sure that the notifications are set up for SoftPhoneApp in the Mac system preferences.
Setting up OS notifications
- From the menu, click the Apple logo and click System Preferences > Notifications.
- Click SoftPhoneApp.
- Choose the banner or alert notification style.
You will receive either a banner or alert notification when you have an incoming call or instant message on SoftPhoneApp. Banner style notifications appear briefly in the top corner of the screen. They will disappear on their own. Alert styles notifications appear and remain on the screen until you take action on them.
Banner and alert notifications
If you receive a banner notification, you can click on the notification to open the call panel or the Messages window.
If you receive an alert style notification for a phone call, you can click Answer or Decline on the notification or click anywhere else on the notification to open the call panel.
If you receive an alert style notification for an IM, you can click Close or click anywhere else on the notification to open the Messages window.

Enabling sounds
You can set SoftPhoneApp up to play a sound in the following events:
- For an incoming call
- For call waiting
- For auto answer
- For hangup
- For an incoming IM
- When mentioned (@) in a Room
- When a contact comes online
- When a contact goes offline
Select Enable sounds to turn on sounds for all the actions. Once Enable sounds is enabled, you can select whether you would like to hear a sound for each event.
You can assign a sound for each event. Click on the event you want to change the alert sound for. Use Browse to locate the file you want to use.
For Windows 10, see Configuring OS notifications to make sure system notifications are enabled.
Settings in the panel
Alerts
Enable alert displays:Determines if SoftPhoneApp displays notifications. Once Enable alert display is selected, you can select whether you receive an alert For an incoming call, When a contact comes online, When a contact goes offline, or For IMs (show alert instead of automatically opening the IM window) by selected or clearing the corresponding box.
- Selected: You can set up alerts for incoming calls, contact presence, and IMs.
- Cleared: SoftPhoneApp flashes in the taskbar (Windows) or the Dock (Mac) for incoming calls, contact presence changes, and IMs.
Windows 10 only: SoftPhoneApp sends a Windows 7 style notification or a Windows interactive toast notification.
Use Windows notifications(Windows only): Determines whether SoftPhoneApp sends Windows 7 style notifications or Windows 10 interactive toast notifications.
- Selected: SoftPhoneApp sends Windows 10 interactive toast notifications.
- Cleared: SoftPhoneApp sends Windows 7 style notifications.
Sounds
Enable sounds: Determines if SoftPhoneApp plays sounds for notifications. Once Enable Sounds is selected, you can select whether a sound is played For an incoming call, For call waiting, For auto answer, For hangup, For an incoming IM, When a contact comes online or When a contact goes offline by selected or clearing the corresponding box.
- Selected: You can set up SoftPhoneApp to play sounds for calls, contact presence, and messages.
- Cleared: SoftPhoneApp flashes in the taskbar (Windows) or the Dock (Mac).
Sound preference: If you have enabled sounds for an event, you can select the individual event and choose a sound to play for that event.
Click Browse and find the file locations for the sound you want to use.
Click Reset to go back to the default sound.
Preferences: Devices panel
This panel lets you select your Speaker and Microphone in Headset Mode and in Speakerphone Mode, and lets you select which device should ring, your Camera, and the maximum resolution for video.
Unless you have made changes in Devices, SoftPhoneApp automatically detects devices at each startup and selects the most appropriate device for audio and video. Your choices apply at the next start up unless the device is no longer in use, in which case, SoftPhoneApp will automatically detect the device to use.
On a new install, SoftPhoneApp uses your system default device for the speaker and the microphone.
Test Devices: Opens the Troubleshooting window.
Test Camera: Opens the Video window and shows the image from your camera.
Headset Mode
Change these fields only if you want to override the devices that SoftPhoneApp automatically selected.
Speaker: Click the drop-down arrow to see the devices detected by SoftPhoneApp. Select the device you want to use for the speaker when you are using a headset.
Microphone: Click the drop-down arrow to see the devices detected by SoftPhoneApp. Select the device you want to use for the microphone when you are using a headset.
Speakerphone Mode
Change these fields only if you want to override the devices that SoftPhoneApp automatically selected.
Speaker: Click the drop-down arrow to see the devices detected by SoftPhoneApp. Select the device you want to use for the speaker when you are in speakerphone mode.
Microphone: Click the drop-down arrow to see the devices detected by SoftPhoneApp. Select the device you want to use for the microphone when you are in speakerphone mode.
Reduce echoes from speakers (AEC): Automatic echo cancellation.
Selected: Improves the sound quality. The feature is typically on.
Other Devices
Ring on: Change this field only if you want to override the devices that SoftPhoneApp automatically selected.
Click the drop-down arrow to see the devices detected by SoftPhoneApp. Select the device where you want to hear the phone ringing.
Camera: Change this field only if you want to override the devices that SoftPhoneApp automatically selected.
Click the drop-down arrow to see the devices detected by SoftPhoneApp. Select the device you want to use as your video camera.
Max Resolution: Click the drop-down arrow and select the maximum resolution you want to user for your outgoing video.
Low (CIF): Common Intermediate Format, uses 352 x 240 pixels.
Medium (VGA): Video graphics array, uses 640 x 480 pixels.
HD (720p): High definition video, uses 1280 x 720 pixels.
HD (1080p): High definition video, uses 1920 X 1080 pixels.
Set to the highest resolution if you have a good camera, a high speed internet connection, and a computer with a fast CPU. You will know if you have set the resolution too high if your computer slows down or the video shows black areas or is slow or jerky.
Set to the lowest resolution only in special situations — using Wi-Fi in a hotel. You will know if you have set the resolution too low if the video is fuzzy.
You can test the resolution by clicking Test Camera once you set this field.
Preferences: Shortcut keys panel (Windows)
SoftPhoneApp supports system-wide shortcut keys and keyboard accelerators. This topic describes how to enable shortcut keys. For keyboard accelerators, see SoftPhoneApp Desktop keyboard accelerators.
- Shortcut keys work regardless of whether SoftPhoneApp is in focus or not. Other applications on your device may interfere with these operations. SoftPhoneApp shortcut keys are disabled by default until you enable them under Preferences.
- Keyboard accelerators apply only when SoftPhoneApp is in focus. They are keyboard combinations that speed up common interactions with SoftPhoneApp. They cannot be enabled/disabled, or customized.
System-wide shortcut keys
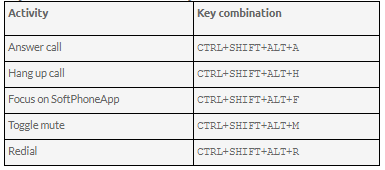

On the Shortcut keys panel of the Preferences window, select Enable shortcut keys to use the shortcuts in SoftPhoneApp. You can also enable or disable individual shortcut keys by selecting or clearing Enable for each action.
To customize shortcut key combinations
You can change the default shortcut key combinations.
- Make sure Enable shortcut keys is selected and the action you want to change is enabled.
- Select an Action and click Edit. The Edit Shortcut Key window opens.
- Select the keys that you want to use in the new combination. Select at least two keys.
- Type the desired letter or number in the field.
- Click Assign.
You can use the new shortcut key combination for the action you selected.
Shortcut key combination rules
The following rules apply to shortcut key combinations.
- You cannot override a standard Microsoft Windows combination such as CTRL+ALT+DELETE.
- The shortcut applies when SoftPhoneApp is running, regardless of the application that is in focus.
- If another program uses the same shortcut key combination, the application that was started later has control over that combination.
- If a shortcut key combination is not valid at a particular moment, entering the combination has no effect. For example, CTRL+SHIFT+ALT+A has no effect if there is no incoming call on SoftPhoneApp.
Preferences: Calls
This panel allows you to configure auto answer, DTMF, and third party call control support.
Answer calls
This section allows you to set preferences for the auto answer feature. To enable auto answer, see Enabling auto answer.
Auto answer after: The time, in seconds, that SoftPhoneApp waits to answer a call when Auto Answer is enabled. Select the number of seconds from the drop-down list. This field can be set from 0 (zero) to 5 seconds. Choose 0 if you want SoftPhoneApp to answer calls immediately. Also pick one of the following:
Auto answer with audio: When Auto Answer is enabled, SoftPhoneApp answers calls with audio only.
Auto answer with audio and video: When Auto Answer is enabled, SoftPhoneApp answers calls with audio and video.
Play DTMF tones back to me
Selected: SoftPhoneApp plays key tones through your speaker when you dial.
Cleared: SoftPhoneApp does not play key tones.
Answer/resume (talk)
Selected: Enabling this allows SoftPhoneApp to be remotely controlled via a SIP talk event, without user intervention, to answer an incoming call and resume a call that has been previously held.
Hold/resume
Selected: Enabling this allows SoftPhoneApp to be remotely controlled via a SIP hold event, without user intervention, to place a call on hold and resume a held call.
Preferences: Files and web tabs
This panel lets you set the locations for call recordings and incoming file transfer, and lets you add web tabs to the resource panel.

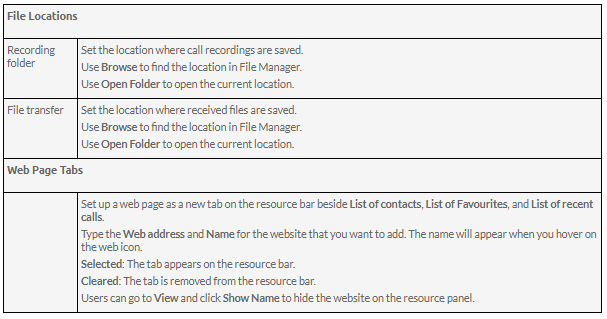
Reference
This section provides reference information regarding SoftPhoneApp.
Troubleshooting
On the Help menu, click Troubleshooting to display the Troubleshooting window.
Devices panel
You can verify that your microphone and speakers are working and can set the volume to a comfortable level without having to place a call.
- Select the microphone and speakers that you want to use from the drop-down menus.
- Speak into the microphone. If SoftPhoneApp detects sounds, you see Your microphone works.
- Click the Play button while listening to the speakers. Drag the volume slider to set the volume to a comfortable level. If your speakers are working, you see Your speakers work.
Audio panel
While you are on a phone call, you can test the quality of the audio.
Note: To perform a valid test, you should be on an established call and not on a call attempt.
Video panel
While you are on a video call, you can test the quality of the video.
Note: To perform a valid test, you should be on an established call and not on a call attempt.
Support panel
If you have contacted CommsChannel Customer Support in order to troubleshoot a problem, you may have been asked to generate a diagnostic log and send it to CommsChannel.
To send a log
- On the Help menu, click Troubleshooting. The Troubleshooting window opens.
- On the Support tab, change the log level to Verbose by moving the slider next to View Log (Windows) or View Current Log (Mac).
- Close the Troubleshooting window.
- Reproduce the problem you were having.
- Return to the Support tab in Help > Troubleshooting.
- Click Send log. The Send Log Report window opens.
- Type a brief description of the problem you were having and click Send Log (Windows) or Send Log Report.
SoftPhoneApp sends the log to CommsChannel.
To view a log
- On the Help menu, click Troubleshooting. The Troubleshooting window opens.
- On the Support tab, click View Log (Windows) or View Current Log (Mac).
CommsChannel displays the reference number of previous logs. You cannot view the previous logs but the reference number could be helpful when you are talking to customer support. The customer support representative can view the previous logs and can use the reference number to find the correct log.
To set SoftPhoneApp as your default softphone in Windows 10
To set SoftPhoneApp as your default app in Windows 10, you have to go into Windows settings.
- Open Windows Settings.
- Click on Apps.
- Click on Default apps.
- Scroll to the bottom of the screen and click Set defaults by app.
- Proceed depending on the screen you see.
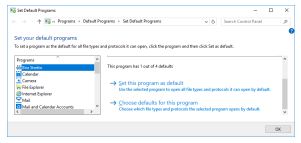
a. Click SoftPhoneApp in the Programs list.
b. Do one of the following:
- To set for all three protocols, click Set this program as default.
- To pick some of the protocols, click Choose defaults for this program. Select the protocol in the list, and click Save.
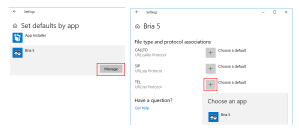
a. Click SoftPhoneApp and click Manage.
b. For each protocol, click Choose a default and select SoftPhoneApp.
SoftPhoneApp is set as your default applications for the CALLTO, SIP, and/or TEL protocols.
To set SoftPhoneApp as your default softphone - Mac
- Click Preferences on the SoftPhoneApp menu.
- On the Application panel, enable Set Application as your default softphone.
SoftPhoneApp is set as your default application for the CALLTO, SIP, and TEL protocols.
Other ways to start SoftPhoneApp
SoftPhoneApp can be started from a hyperlink or a Windows command line.
To start SoftPhoneApp from a hyperlink
You can attach a hyperlink to a phone number or a softphone address that start SoftPhoneApp and dials the number when it is clicked. For SoftPhoneApp to start dialing when a user clicks the hyperlinks, the user must configure SoftPhoneApp as the default phone and associate SoftPhoneApp to the protocols.
Attach a hyperlink in this format:
dial address_or_number
For example:
dial [email protected]
To start SoftPhoneApp from the command line - Windows
Note: This is a historical integration. CommsChannel does not recommend this for new integrations. Users with existing integrations should look at moving to the Desktop API.
You can start SoftPhoneApp from a Windows command line. You may need to add the install directory (typically C:\Program Files (x86)\CommsChannel\SoftPhoneApp) to the PATH environment variable in Windows.
To launch SoftPhoneApp, type:
You can also run these action commands:

where action and input are:
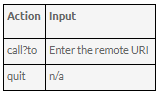
Examples
Example 1:

Example 2:

SoftPhoneApp no longer supports im?to and add?contact. Customers looking to integrate these features need to use the Desktop API.
SoftPhoneApp Desktop keyboard accelerators
Keyboard accelerators apply only when SoftPhoneApp is in focus. They are keyboard combinations that speed up common interactions with SoftPhoneApp. They cannot be enabled, disabled, or customized. They are different from system-wide shortcut keys that can be customized in Windows.
Windows
Making or answering a call
- CTRL+N: Answer an incoming call
- CTRL+D: Decline an incoming call
- CTRL+R: Redial the last number called
- CTRL+R then ENTER: Redial the last number called
- CTRL+E: End a call or end a conference call (hang up on all participants).
During a call
- CTRL+M: Mute your voice
- CTRL+H: Hold or resume a call when the focus is on the call panel
- CTRL+T: Transfer an established call when the focus is on the call panel
- ↑ (Up arrow): Turn the call volume up when the focus is on the call panel
- ↓ (Down arrow): Turn the call volume down when the focus is on the call panel
- F11: Display the Video window in full screen when the focus is on the Video windows
Opening a window
- SHIFT+CTRL+M: pen the Messages window
- F8: Open the Preferences window
- CTRL+F9: Open the Support tab in the Troubleshooting window
- F1: Open Help in a browser
Exiting
- CTRL+Q: Quit SoftPhoneApp.
Mac
Making or answering a call
- CTRL+N: Answer an incoming call
- CTRL+D: Decline an incoming call
- CTRL+R: Redial the last number called
- CTRL+R then ENTER: Redial the last number called
- CTRL+E: End a call or end a conference call (hang up on all participants).
During a call
- CTRL+M: Mute your voice
- CTRL+H: Hold or resume a call when the focus is on the call panel
- CTRL+T: Transfer an established call when the focus is on the call panel
- ↑ (Up arrow): Turn the call volume up when the focus is on the call panel
- ↓ Down arrow: Turn the call volume down when the focus is on the call panel
Opening a window
- SHIFT+COMMAND+M: pen the Messages window
- COMMAND+: Open the Preferences window
- CTRL+F9: Open the Support tab in the Troubleshooting window
- SHIFT+COMMAND+V: Open the Video window
- SHIFT+COMMAND+?: Open Help in a browser
Exiting
- COMMAND+Q: Quit SoftPhoneApp.
Contact list headings
Following is a list of heading that are used in the SoftPhoneApp contact list. This list can be useful when formatting a contact list to import into SoftPhoneApp.